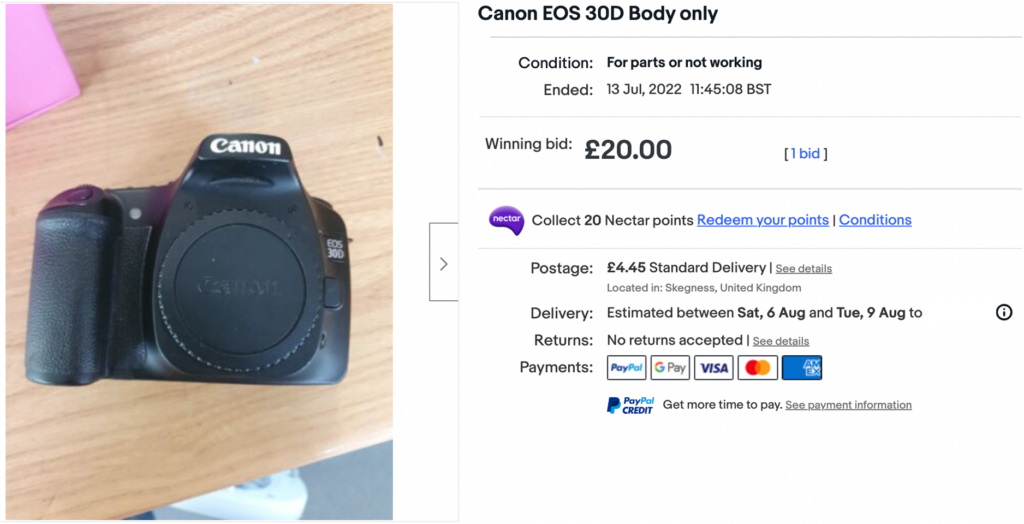
Some time in July I searched eBay for Canon DSLR’s and sorted by cheapest first. The top result was a Canon 30D for all of £30. This didn’t seem to make sense, for that money either the seller didn’t really know what they had or it was broken.
The listing was indeed “for parts or not working” but that can mean anything from a lost charger or no battery to the item being in pieces. For the detail it would be sensible to read the description, wouldn’t it?
Here’s that description in full:
Canon EOS 30D Body only.
That’s it. Anyone in their right mind would read that and instantly know there’s a very good reason for the lack of description – it’s broken. So, I promptly put an offer in.
In this post:
- Buying a bargain
- Initial diagnosis
- Mirrors, mirrors everywhere
- It’s fixed!
- Off my face on H2O2 and NH3
- Unexpected surgery
- Do you like fungus? I’ve got more fungus.
- Conclusions and learning
Buying a bargain
The original listing was a £30 buy it now which is steep, bordering on vertical for an allegedly broken camera. In excellent condition, a 30D should sell for around £50 these days, maybe slightly more. Broken, it is next to worthless.
Looking at the pictures, whatever the problem was, it didn’t seem too terminal. The camera was shown powered up which instantly eliminates a host of potential problems and furthermore, cosmetically it looked really good.
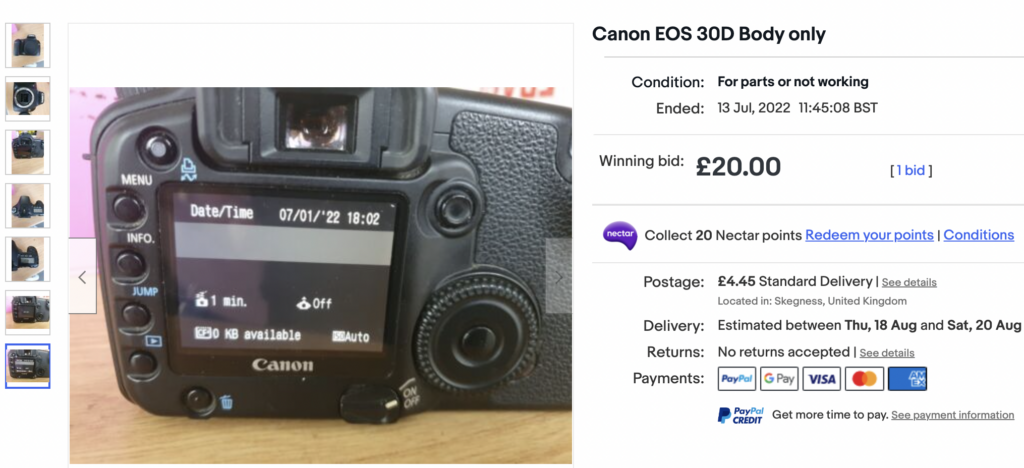
With this in mind, I put in a relatively cheeky offer of £20 on the premise that if it was beyond my repair skills I’ve not lost a great deal and I could probably use it for parts.
They surprisingly accepted and within a few days it had been posted out.
Initial diagnosis
When it arrived, the camera was in really good cosmetic condition. Visually there were very few signs of use, no obvious bumps or scratches, the viewfinder was clean and clear and neither display had any scratches or damage.
I put a lens on and tried to take a test shot, it flashed the focus point and then nothing happened. I thought for a second that it might have a faulty shutter or shutter button, but that didn’t make sense with the focus points registering that the button had been pressed.
I checked a few more things that might prevent the shutter firing and tried again. This time it took a picture. How odd? I tried again and nothing happened. Intermittent shutter? Stranger still.
I took the lens off, cleaned the contacts and tried again with a different lens. For good measure, I also gave the shutter button an alcohol bath to see if that made any difference. This gave false hope as it fired off a couple more shots before refusing to work again. It was time for a closer look.
Mirrors, mirrors everywhere
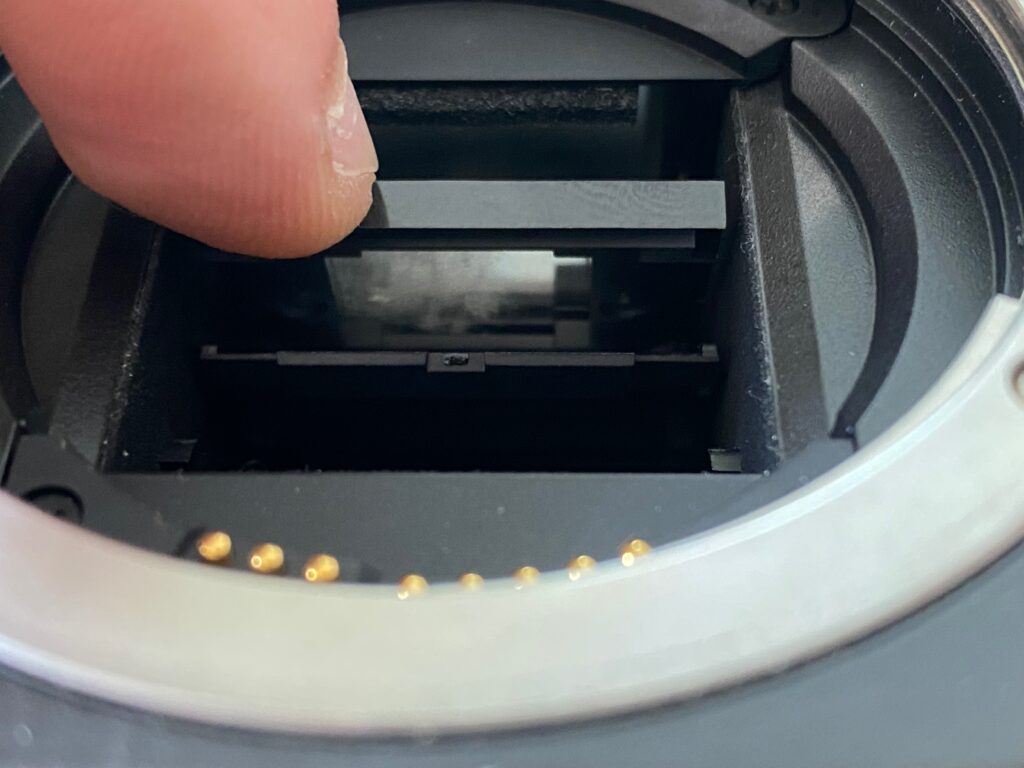
I shone a torch into the mirror box to have a closer look. The mirror looked dirty so I gave it a careful going over with a soft cloth which seemed to do nothing at all. After a bit of beard scratching and poking around I discovered that both the main mirror and the auto focus mirror were covered in fungus.
Bugger. This was not going to be an easy job because it wasn’t on top of the main mirror, it was underneath. In the list of things I’ve done for you, so that you don’t have to, we can now add manhandling camera mirrors to clean them. From my mistreatment of the 30D mirror assembly I can tell you in painful detail why this cleaning operation wasn’t simple.
The main and AF mirrors are interlinked and designed to move in tandem. The first mirror in the 30D is actually not completely reflective, it allows some light to travel straight through it to the AF mirror that sits behind. The main mirror reflects light up into the pentaprism and viewfinder, the AF mirror reflects it down to a series of sensors on the bottom of the mirror box.
When you take a picture, the main mirror lifts up to reveal the sensor. As it does so, the AF mirror lifts at the same time and folds neatly in to place underneath. Consequently, when you lift the mirror to clean underneath or behind it, the AF mirror rises up and tries to close up to the back of the main mirror. As you’ve probably figured out, this is quite the problem when the back of the mirror is full of fungus.
I managed to soak the mirror assembly with 99% alcohol and swish around cotton buds until it looked quite reasonable, all whilst holding the mirror slightly up – enough to get to the back, not enough to clamp the AF mirror on a cotton bud.
It’s fixed!

It took a lot of polishing to get the smears off both mirrors but after a short while I’d got it to the point where most of the fungus had been cleaned off. I attached a lens and fired off some test shots and it worked again!
Well, it worked more than it did before. I was achieving about a 50/50 ratio of shots that would focus and fire and those that would point blank refuse to work. Out of nine focus points, only the middle one was working. Progress, definitely, but not fixed.
Taking it apart again, I could see under a strong light that the mirror was mostly clean but I couldn’t get to the edges. I tried a lot of different methods of getting to these edges but it wasn’t going well, the AF mirror was repeatedly in the way. I tried dermal brushes, cloths on bits of bendy stick, bendy cotton buds, soft brushes but nothing worked well.
There is a need to be very delicate when you’re messing with a mirror assembly. They’re not so delicate that they just fall apart at the slightest touch, but if you go at it too hard the mirror glass will gladly pop out as it’s only really held down by some very small clips and a bit of glue. Remember all that alcohol I’m pouring in there? That dissolves a lot of adhesives…
Finally, I got it to the point where it looked really quite good except for the very extreme edges. I tested one more time and it seemed much happier – happy enough to be tested. I put it away on a shelf until I could get round to taking it out for a proper walk.
Off my face on H2O2 and NH3
Eventually I got round to picking the 30D off the shelf to use it properly. Not wanting to trek to a location and find it was broken, I charged the battery up and then gave it a few test shots in the house before I left.
It was broken.
The test shots showed that it was firing approximately 20-30% of the time, not exactly conducive to a relaxing meander with a camera. It was time to investigate how to properly clean fungal growth on camera lenses and mirrors.
The hive mind of the internet decreed that in order to truly kill fungus you need a concoction of Hydrogen Peroxide and Ammonia. Hydrogen Peroxide is used to dye your hair blonde, if you have any hair to dye that is. Ammonia is often used as a household cleaner and both chemicals are fairly nasty. H2O2 will happily burn your hands if you touch it without gloves on, which is why it is used in really low concentrations when you stick it on your head.
It took a little bit of searching to find both in relatively pure forms and not simply as an ingredient in something else. As you can probably conclude for yourself, the government doesn’t really want anyone who fancies it to be able to buy strong, pure chemicals in large quantities.
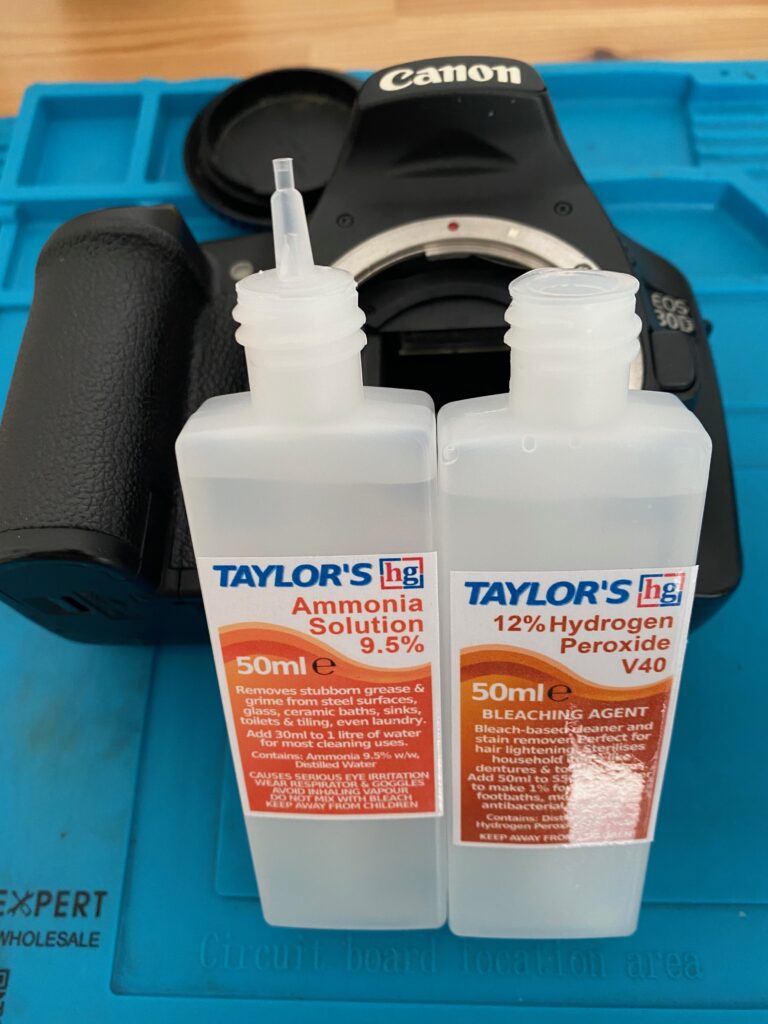
To cut a long story short, I mixed the two bottles above together and set about soaking both mirrors in as much of the solution as I could without filling other parts of the camera with liquid. The results were quite remarkable. After some scrubbing and cleaning with the usual tools, both mirrors came up completely clean. I gave them one final polish with alcohol and a cloth and this is how they now look:

You know what comes next – lens on, test shots, broken.
Well no, actually, this time it fired away reliably each and every time. My god, I’d fixed it.
Unexpected surgery
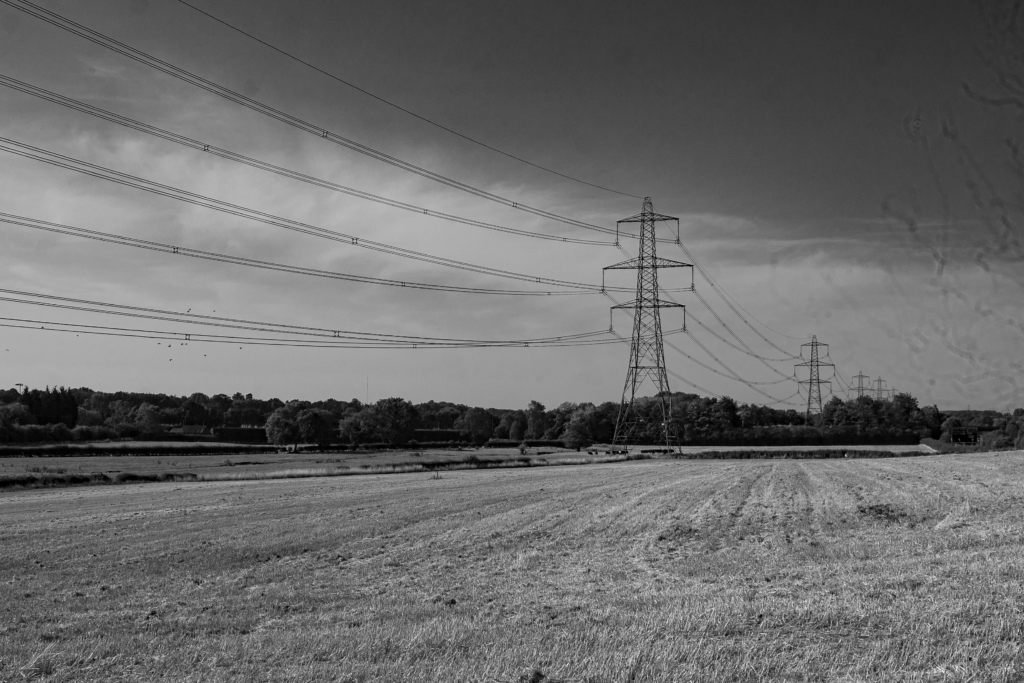
I popped the 30D in a bag and hopped on my bike to quickly go to a few locations I had in mind. This wasn’t the best idea I’ve ever had, riding around in a heatwave was absolutely brutal and I pretty much melted by the time I’d popped off the last few pictures I wanted to take.
The only complaint I had about the 30D the whole time was that there is definitely still an issue with the shutter button and it isn’t focus or mirror related. To explain, the camera won’t fire if it doesn’t achieve auto focus. There is a little green light inside the viewfinder that goes solid when focus is obtained, or it’ll flash at you if not and refuse to take the shot.
This feature turns off if you go into manual focus, which makes sense – you are taking control so you should know if the image is ready to go or not. I noticed a few times that nothing happened when pressing the shutter fully and when I paid it some attention the camera was happy with focus yet still refused to take the picture. I tried manual focus and still had some missed shots – confirming the mirror and AF have nothing to do with this problem. I did find that firmly pressing the shutter tended to reliably work, but this isn’t ideal.
I do wonder whether there has been some kind of water or damp ingress that has caused corrosion around the shutter button, but this will be an investigation for another time.
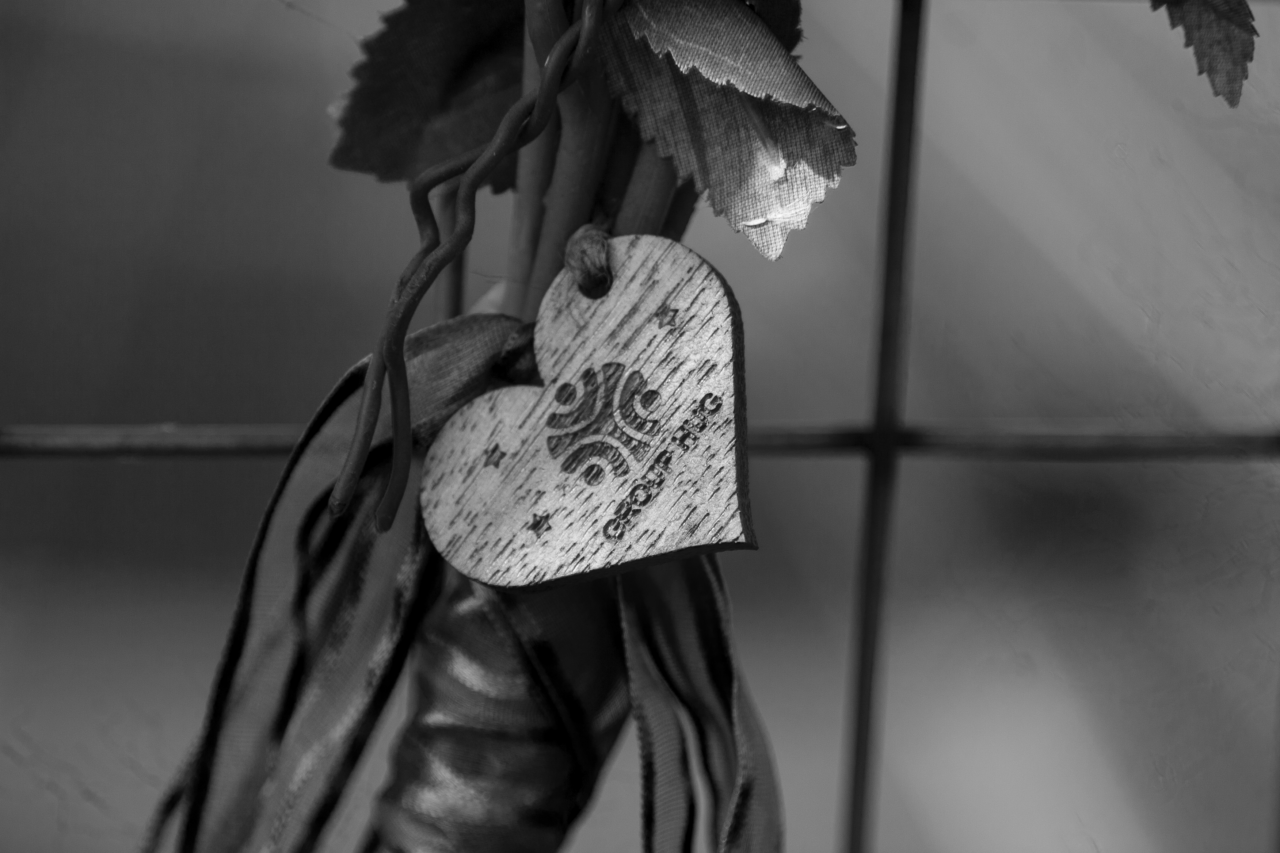
Getting home, I popped out the memory card, dumped the files to my image editing machine, clicked the first one I wanted to look at and then promptly had a small breakdown. Have you spotted the problem in the previous images yet?
Do you like fungus? I’ve got more fungus.
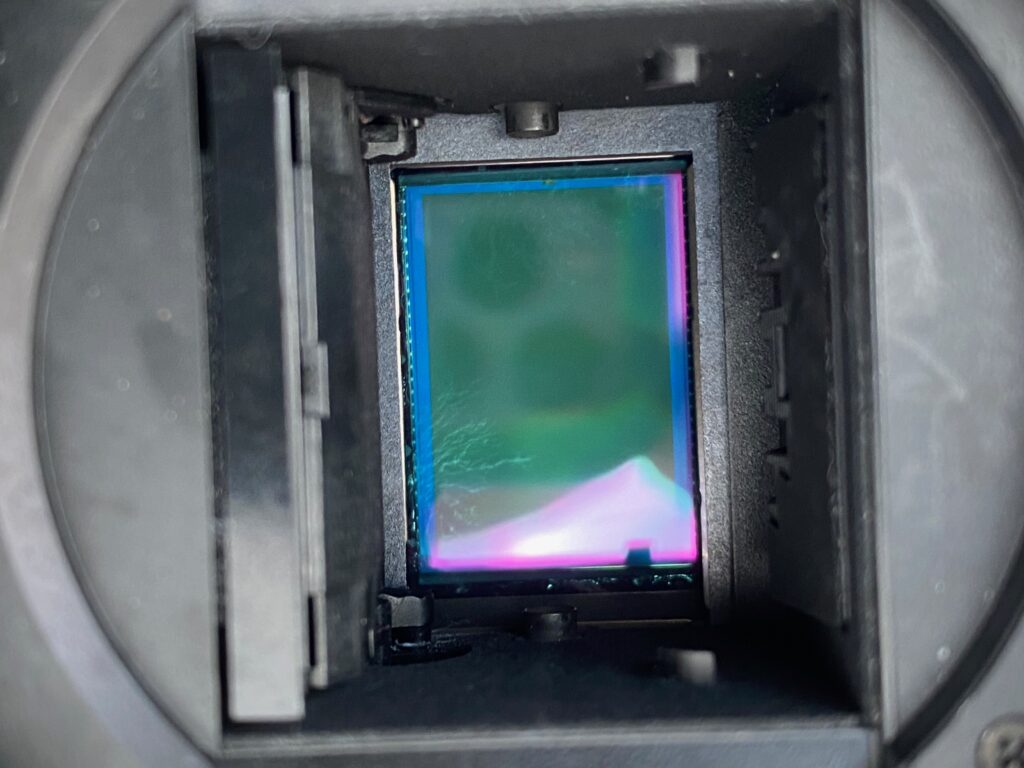
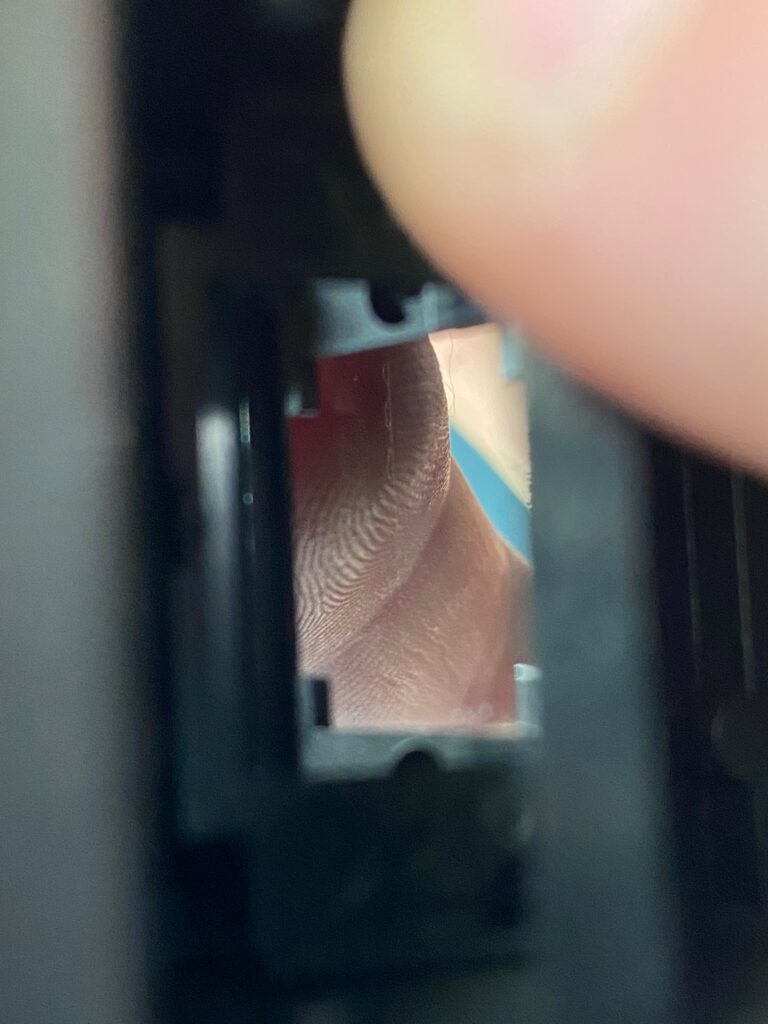
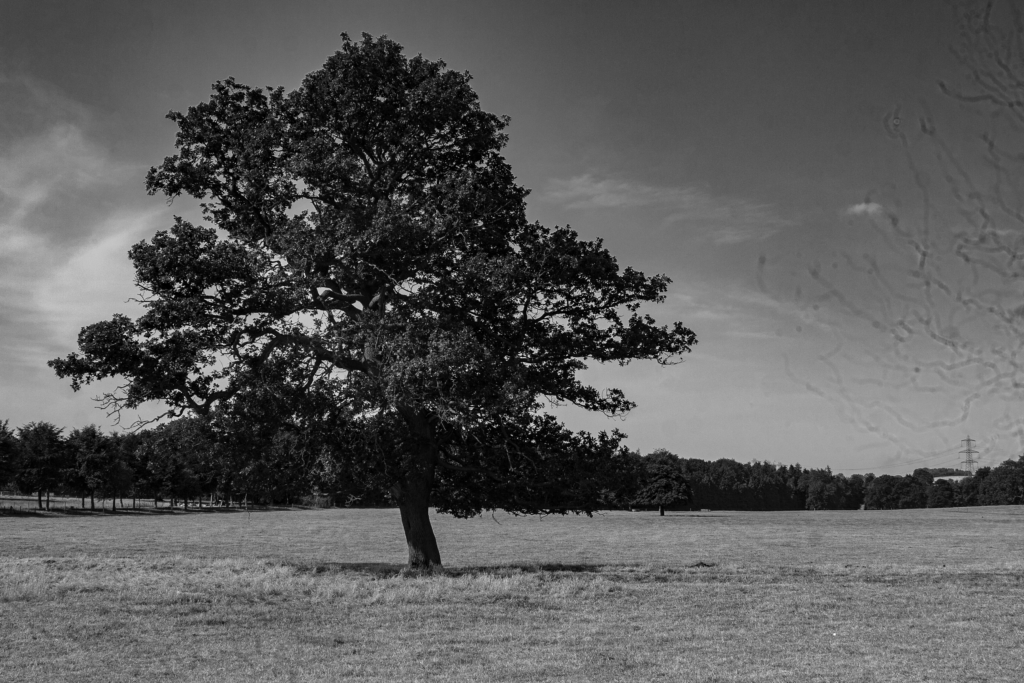
Every image that came out of the camera looked like I’d been struck by lightening whilst taking it. I knew straight away what this meant – the sensor also had fungus on it. However, this was not going to be the simple fix that the mirror assembly was.
If you’re a regular reader, you may remember I first came across this problem on my epic journey to get a working 300D. Digital cameras are sensitive to a much wider light spectrum than our eyes, as such they have a special filter directly in front of the sensor called a “hot filter” which removes infra-red light that would make your pictures look a little weird. When a sensor becomes a victim of fungus, it seems that it only grows behind this piece of glass. There is only one way to fix this – surgery.
Digital sensors are not meant to be taken apart by you or I for very good reason. They are very accurately assembled to achieve even focus across the whole image (they have to be perfectly flat) and also completely clean so you don’t get dust spots in every image you take. I don’t know about you, but I can’t afford a clean room to avoid getting a single speck of dust in the sensor assembly, but it’s either this or put it in the bin and that’s against everything I believe in.
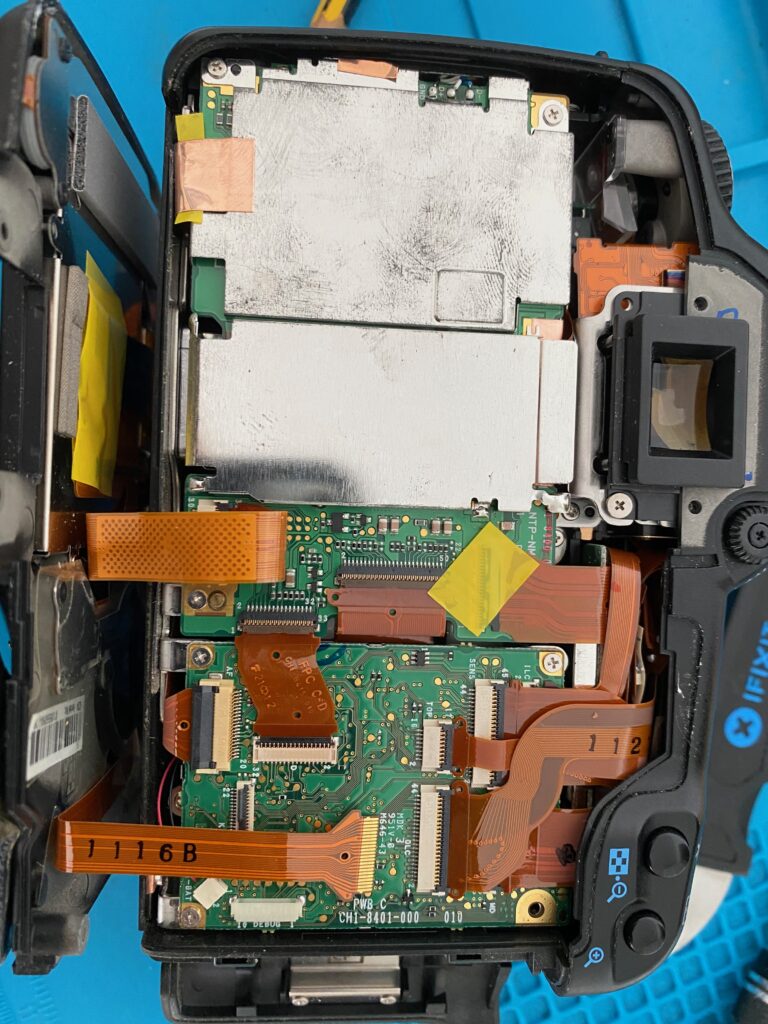
Disassembly isn’t actually too complex, it is just a slow and laborious process as you work your way down through the layers of ribbon cables, delicate connectors and bits that need to be desoldered in order to remove boards that are in the way.
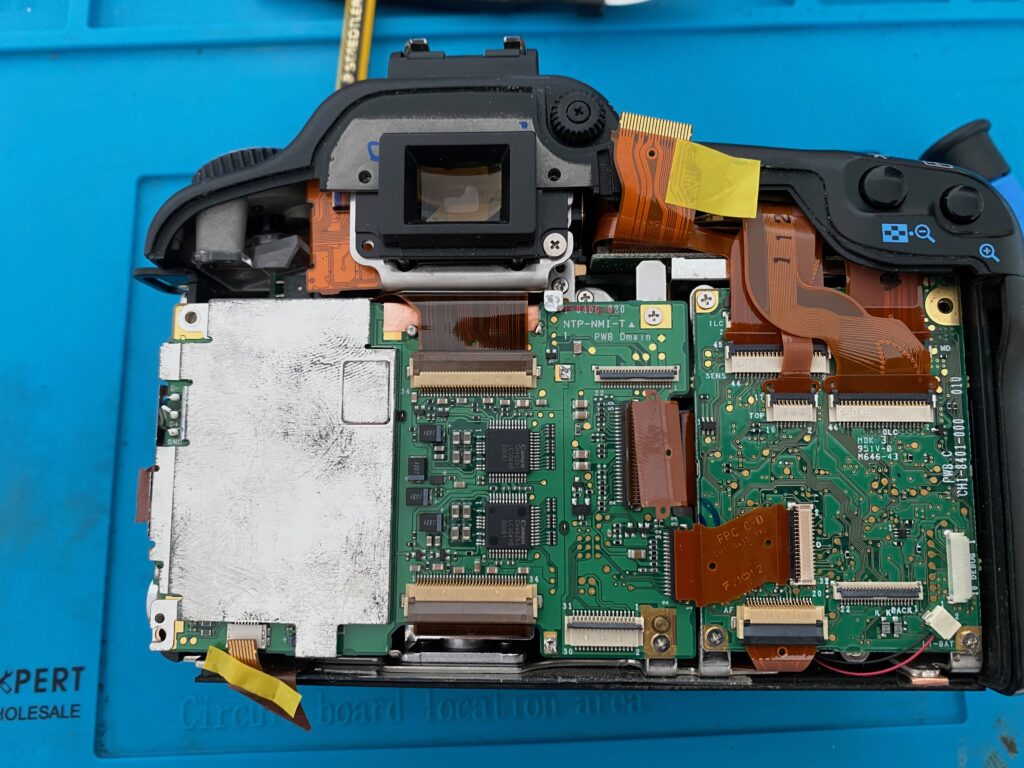
The 30D was definitely easier to take apart than the 300D for the same reason. Although both require desoldering of shielding and removal of a million ribbon cables, they are in far easier to reach locations on this body.

When you get down to the sensor you are now at the point of no return, you are putting the red log in the steam engine on Back to the Future 3. Once removed, you are going to have to do some serious work to make sure everything goes back in a balanced way and free of dust and dirt.
Only three screws hold the entire thing in place and they are packed with tiny shims to make sure it sits completely flat – don’t lose these if you ever find yourself doing the same thing.
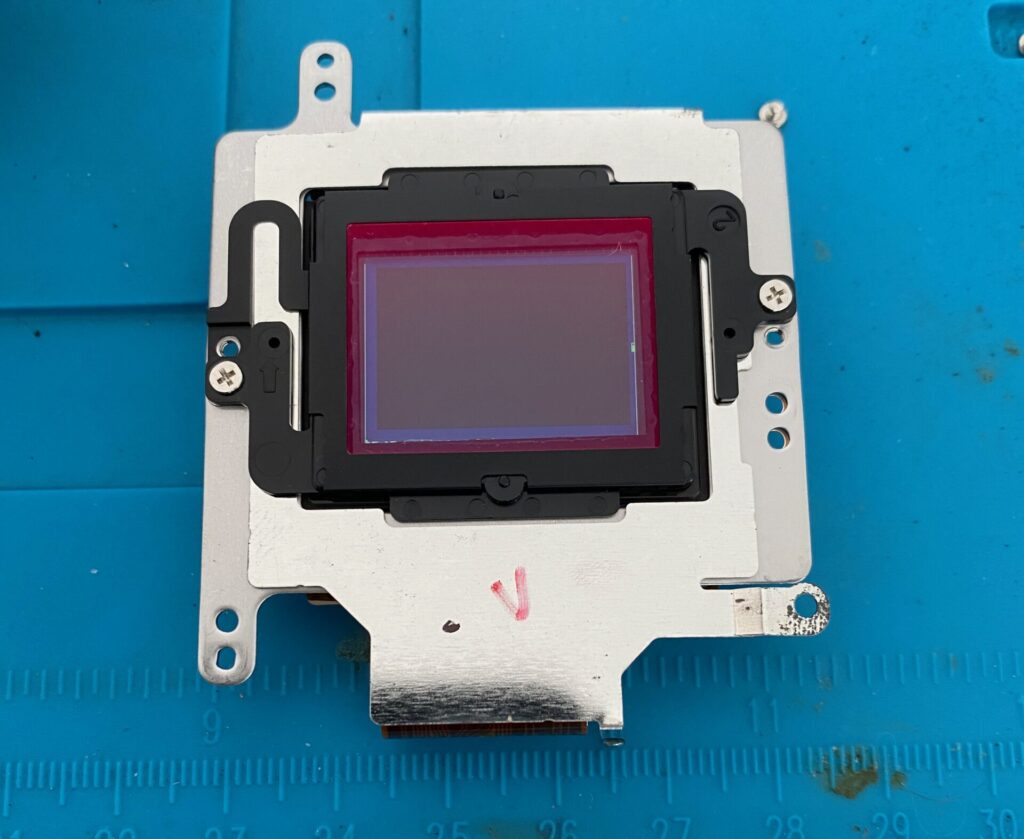
The IR filter is held down by both screws and an adhesive gasket. It takes some delicate work with a blade to prise the adhesive off without ripping the gasket – you need this for reassembly if you want to stand any chance of sealing the sensor back up properly. On a side note, if you wanted to convert this to an IR only camera, this is what you’d change.
The cleaning of both sensor and filter took forever. My method was to first scrub off all the adhesive with alcohol, then a chemical bath for the fungus, then polish followed finally by shining a very bright light on the two pieces whilst further polishing out any spots with smears still visible. I then gave each part a good seeing to with the rocket blower before putting it all back together again.

A couple of hours later I had managed to fully reassemble the body without breaking anything, snapping a ribbon cable or losing a screw. A real success if you ask me.
Conclusions and learning
Did it work again? Yes. Was it worth it? Yes.
To test the repair I took a picture of a plain white surface and there is almost no dust to be seen. That’s a real result when you’ve taken apart components that should be assembled in a proper clean room. The fungus is completely gone and, other than that odd shutter button problem, the camera is now completely functional again.
What is there to learn? Well, there’s the obvious in that any time someone is coy about describing their item it is because it’s broken. Anyone wishing to maximise their potential income will provide a story, as much detail as they can in order to entice buyers. The opposite is true when you’re trying to offload your broken tat.
More importantly, I’ve learned that this type of repair is not actually that imposing or difficult. I’d have no problem attempting this again on a different body. It has also given me the confidence to perform an IR modification myself, if only I could find 720nm glass anywhere for less than £100 (which is absurd) I’d be right on it. If you know where to get these filters, let me know.
There must be so many cameras lying about that have been stored in damp or moist conditions that have decayed in the way this 30D had. If you have cameras, especially those that you don’t use for a long time, they need to be dry, completely dry. Putting them in a bag with silica gel is a good start, but don’t expose them to any kind of condensation or moisture.
The 30D is a great camera, but absolutely zero in the way of improvements over the 20D and as I previously discovered, working copies of the 20D are available for the same price as this broken 30D was. There are no 30D’s available for less than £40 that I can find at the moment and that’s not an attractive proposition to the budget digital photographer.
Ultimately, reuse and repair are so important in todays society where we are constantly encouraged to upgrade and discard old electronics. There is so much use to be had out of these old machines that I would absolutely recommend picking cameras like this up, even if they’re broken and you fix them until they don’t work any more, you’re still learning.
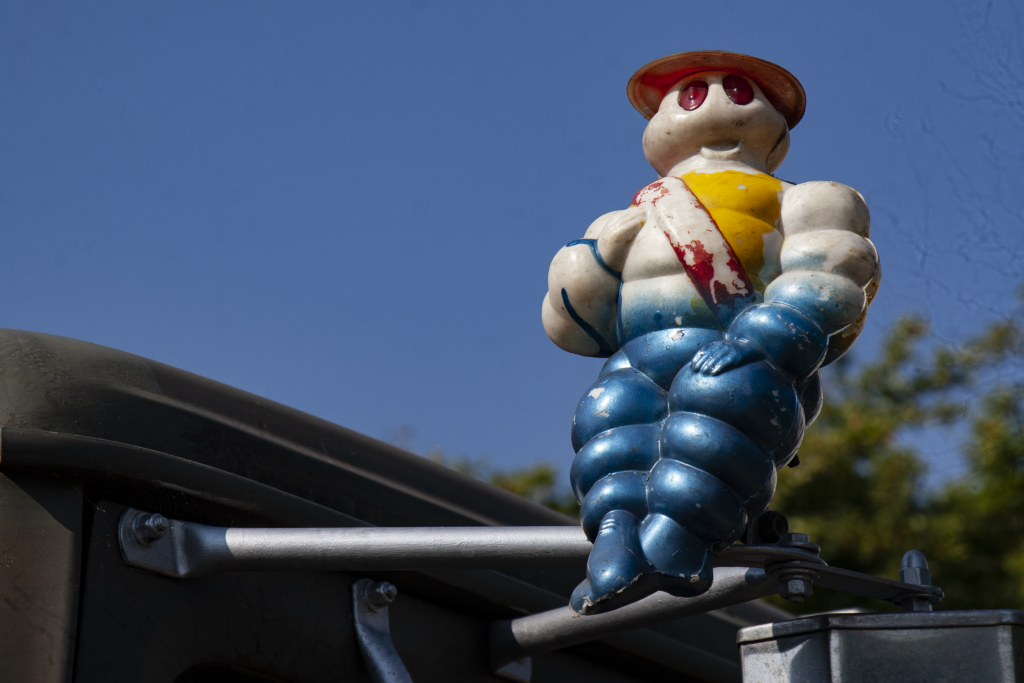
Now, I need to go and shoot some images that don’t look like they’re taken in a thunderstorm. Back soon.
Share this post: