This was going to be an article about my experiences of push processing film from 400 to 800 for the first time. For those of you who are new to film, or if you’ve never heard these terms before, pushing and pulling are photographic terms for using a film beyond its intended or advertised sensitivity. For example using an ISO 400 film at ISO 1600 instead.
As I started to write, I realised I wanted to understand why push and pull processing was possible and how it worked. Being who I am means that I cannot just do something and accept it for what it is, I have to know why something works in the way it does.
I quickly discovered that the answer to how and why pushing and pulling film works is both complicated and not really explained simply nor clearly in any one single place to the level of detail I needed. So began a long, confusing and time consuming journey to get to the answers for what I initially had thought were fairly basic questions.
Now I’ve done all the hard work, wouldn’t you like the simplified summary of how film really works? Of course you would!
- What does the ISO speed of a film mean?
- A chemistry lesson
- Tickling atoms with light
- Latitude and box speeds
- Why can we push film?
- Push processing
- Conclusions and learning
- References and Resources
What does the ISO speed of a film mean?
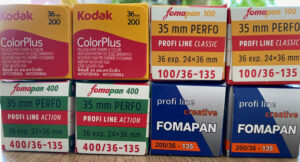
When you buy a film, it comes with an ISO speed printed on the box. Commonly, these will be 100, 200, 400 or 800 and this is known as the native or “box” speed of the film. Films either side of this range exist, but are considered to be speciality films. As a rule, the lower the ISO number the “slower” the film is said to be and the higher the ISO number, the “faster” the film is.
Slow films have the characteristic of being less sensitive to light, consequently you need good natural light, potentially flashes or a even a studio set up to achieve reasonable shutter speeds with those films. The trade off advantage for this lack of sensitivity is a cleaner final image with less visible grain or noise (more on what grain actually is later on). There is potential for lower ISO films to exhibit less contrast and therefore reproduce a greater tonal range.
You’ve probably guessed the opposite side of this equation – when the ISO is higher, you gain the advantage of more sensitivity to light, enabling faster shutter speeds in poorer lighting conditions. The downside is equally predictable in that the final image will exhibit more obvious and visible grain or noise, furthermore you may get more contrast in images, with less tonal range between shadows and highlights.
Without going off on a tangent about artistic license and personal preference, there is no “correct” look for a photographic image. Let’s face it, the art world is bonkers enough when a painting of three coloured stripes is considered a classic which has sold for millions. If this were a formula, then any flag maker would be raking it in.
The bottom line is that some photographers love grain and contrast to the point where they want images that resemble a cross between a magic eye picture and the interference you used to get on an old detuned TV, whereas others hate the look and want the finest, sharpest image possible. It’s personal preference.
The speed printed on the box is a convenient way of making a decision based on those light sensitivity, contrast and grain choices already mentioned, but what does the number actually mean?
The answer comes in two parts – the first is the easy explanation, the second involves the chemistry of film emulsions and has taken me far longer and involved far more reading than I ever envisaged would be necessary.
Films, depending on the underlying chemistry used in their emulsions, will contain a varying amount of silver halide crystals. These are the actual light sensitive part of any film and those crystals will be of different sizes depending on their chemical composition. Larger crystals capture light more easily and so are used in faster films, smaller crystals require more time to achieve a correct exposure and therefore are found in slower films.
You knew there was a tradeoff, didn’t you? Those larger crystals mean more visible grain or noise in the image, but what exactly is a Silver Halide crystal in the first place?
A chemistry lesson

When I set out to learn something, I always end up disappearing down a spiral of asking “…but what does that mean? How does that part work?” So every time I discover something new, I then have to go and learn about how that works until eventually I either give up because my brain hurts or I finally get deep enough to be able to unwind everything from the bottom back up and give a detailed explanation of what on earth just happened.
This is exactly what happened when I started to look in to film and why it can be pushed or pulled. If you Google pushing or pulling film you will find a million pages that will gladly explain how to do it and what it means, but not one of them explains why it is possible. The question I had in my head was along the lines of “if silver halides are light sensitive and create the image, how does exposure work – how is it possible to represent a greyscale on film?”
Black and white film consists of some kind of transparent plastic (base), a light sensitive emulsion on which the image will be created and an anti halation layer which basically stops ghosting in the final image. To understand exposure, we must first understand what that emulsion consists of.
An emulsion is the term used to describe two or more liquids that have been mixed together. The clever part is that these two liquids do not mix under normal conditions. The emulsion we are interested in consists of two key ingredients – Gelatine and Silver Halide.
A halide is another word for a salt but not the kind you put on your chips. A metallic element when oxidised and dissolved in water (or a soluble liquid) forms a base solution and it just so happens this is also called a salt.
Silver oxides are mixed with one of three different elements to form the halides used in photographic negatives, namely bromine (Br), chlorine (Cl) and iodine (I). All of these elements alone are fairly nasty and can all cause skin burns, irritation or in the case of chlorine, will kill you if you’re exposed to too much of it. If you ingest too much Bromine it can give you psychosis and delirium…

Each of the three types of silver halide used in photography have slightly different sensitivities to light. Being as the exact formula used to create an emulsion directly affects how a film will behave in use, manufacturers keep them a closely guarded secret and I could find no information about the exact chemical mixture used in any common film bases.
Once a manufacturer has decided on their particular mix of silver halides they are suspended in gelatine which has some really rather unique properties. It enables the formation of extremely thin layers of emulsion to be used on a film base, perfectly suspends the silver halide crystals and prevents their movement, is translucent to allow light to hit those crystals and finally is resistant to water so your image doesn’t simply fall off the negative during development. It is incredible that no manmade alternative has been found for this almost unique material, but still as of 2022 there is no viable alternative.
Depending on the quantity and types of silver halides used in an emulsion, it will contain larger or smaller crystals and these may be tightly or more loosely packed together. These variables give each film its unique properties, sensitivity to light and ultimately the look and feel of the final printed image. The ISO rating given to a film will be based on controlled tests of each emulsion and how it responds to set light levels over a given period of time.
Tickling atoms with light

When a photon of light hits the film some real magic occurs. Painting over some really quite complex chemistry with a very large brush, the silver halide crystals are imperfectly formed and this imperfection is what allows them to be sensitive to light (perfect crystals don’t react to light at all). The photon causes an electron to be “freed” in the crystal structure and the silver ion contained in the crystal reacts to form a speck of pure metallic silver. This spec (and millions more on the same frame) form a latent image – an image which technically exists, but you can’t see it yet.
To answer our previous question about representing greyscales, the amount of light hitting the frame in different places will affect the quantity of these reactions that take place. In areas of particularly bright light, clumping can occur giving a particularly dense looking final image. In areas of low light or contrast, a varying level of these reactions will occur, affecting how dense the areas of silver are and therefore giving the appearance of a range of density and tone in the final image. The clear base of the film also adds to the tones that can be represented when light is shone through the developed negative. Developed specs act as a filter, changing the amount and colour of light that shines through to a photographic paper or scanner.
The magic doesn’t finish here. After finishing a roll and cracking out our “Chemistry Set for Big Children” the developer gets to work in making these reactions visible. If you thought film contained some nasty chemicals, developer is the next level and really does need to be handled with care. Developer usually contains hydroquinone (which can change the pigment of your skin and is toxic to both operator and environment), Sodium Hydroxide (a strong alkali that will eat your skin) and Potassium Bromide (which surprisingly won’t kill you) amongst other various compounds designed to control the chemical reactions taking place.

It is accepted that to be visible in the final negative or “developable” an exposed crystal of silver halide must be four or more atoms large. The developer acts to turn any crystals which have been exposed to light completely black, the crystals that have not been exposed to light do not contain metallic silver and therefore do not react with the developer.
After some time in the developing solution the image is technically visible, however all of the crystals which were not exposed to light are still light sensitive. If the film were to be removed from the tank at this point, these remaining crystals would react to light and ruin the negative. This is where fixer comes in.
Fixer, usually sodium thiosulfate, actively dissolves silver halide crystals. This process then leaves behind clear areas on the negative – it literally reduces the film back to the base and gelatine layer which is transparent.
At the end of this monumental journey through photographic chemistry, what have we learned?
Photographic emulsions are extremely complex when we dig down to the underlying chemistry. The speed of a film is dictated by the size, density and type of silver halide crystals used and these factors combine to decide not just sensitivity to light but also the characteristics of the final image in terms of contrast, tone and the level of visible grain.
Finally, we learned that darker areas (shadows and blacks) are represented by an absence of light hitting the crystals and will be represented as clear areas on the negative after the fixer has removed the crystals that were present, mid tones are produced by the varying density of crystals which have been activated by light and finally the highlights are where the greatest amount of light has hit the film, causing the greatest and densest areas of chemical reaction to take place. This is all revealed during development and fixing.
We are half way to understanding why it is possible to push and pull film!
Latitude and box speeds
We take ISO speeds for granted and seem to inherently understand what they mean. However the truth is that working out film speeds and sensitivity is, to quote a phrase, quite complex.
Film speed is a bit complicated because it uses antilogs and Average Gradient
Kodak – Basic Photographic Sensitometry
Each film we buy comes with a speed printed on the box, for example ISO 200 or 400. This allows us to make relative decisions based on film speed but is actually giving us information about the relative time each film will take to create an identical density of image. Does your brain hurt yet?
Under very controlled circumstances, film manufacturers will expose their films to a known quantity of light for a fixed period of time. After correct development, the density of silver left in the film gives information about how the emulsion responds to exposure. After some very complicated maths and making friends with various log scales, the ISO rating of a film can be calculated and printed on the box.

Long story short, this ISO rating is taken from the middle of the density curve a film creates – the ideal exposure level. The fact that we can plot film density on a curve instantly tells you that obviously a film is capable of creating a range of densities (images) when exposed to more or less than the ideal amount of light.
This is the lightbulb moment – film is not merely sensitive at one light intensity, it is sensitive to a huge range of exposure.
When a film is pushed, we are setting the meter in the camera to a higher ISO level than the advertised box speed. The meter will then decide that higher shutter speeds can be used in any given situation than if we were using a lower ISO. The result? Underexposure. There is now less light hitting our negative than would usually be required to achieve a correctly exposed image or that ideal midpoint of density.
We need to pause and ask what correctly exposed actually means as this is certainly different when compared to digital imaging. In film photography, correctly exposed means:
- A final image which contains a broad, balanced range of shadows, mid tones and highlights
- Has been exposed correctly according to the requirements of the scene or desired effect to be achieved
- Has been developed for the expected time, in a stock developer as prescribed by the film manufacturer
- Has been developed at the correct temperature, usually a constant 20 degrees Celsius
Photography is not a logical, mathematical process where a simple formula can be applied to a scene. The term “correctly exposed” is actually fairly meaningless in photography. Take an image which consists of a huge amount of negative space which is simply shadow, an area of light cutting through it giving contrast. Technically this image isn’t “correctly exposed” but artistically it is exactly what was required.
By deviating from the expected or standard development process, we can shoot at different speeds and then still achieve a correct exposure. But how does that work? How can we pull detail out that wasn’t correctly exposed?
Why can we push film?

The thing about light is it’s fast. Really fast. Faster than your brain can ever comprehend.
We have a nasty habit as humans of believing we can make sense of the world around us and when it comes to light, we don’t stand a chance. To put it in a photography context, the fastest shutter speed on any camera that I know of is 1/8000th of a second. This means the shutter is open for 0.000125 seconds. Not very long, right?
In that time, light can travel 23.2853 miles (or 37.474057 km). That’s almost a marathon, in 1/8000th of a second. Fast.
The first thought that comes to mind when underexposing an image is that there “won’t be enough light.” There will be no problem with light being able to make it through the open shutter and on to the film at any shutter speed we care to use, unless we are in complete and utter darkness. The problem comes from how the light reaches your lens and consequently your film in the first place.
A scene isn’t made up of a direct light source going straight in to your lens, not unless you’re taking a picture of the sun which isn’t advisable unless you’ve decided your eyesight is no longer necessary. Whatever the light source, the image is made up of light reflecting off various surfaces, each with different properties. Some will “absorb” light, that is they don’t really reflect much at all, some will reflect lots. Furthermore, some areas will be lit by light reflecting off something else – a secondary source (think of the moon, it doesn’t produce light but does reflect it so we can see it at night).
This bouncing around of the light affects your final image because you are mostly capturing reflected rather than direct light. Areas of shadow obviously reflect far less light than brighter areas in your image. What we are doing when we select a shutter speed and aperture is effectively deciding how much light we want to collect from each area of the scene in front of us.
Given a long enough exposure, we can collect sufficient reflected light from areas of shadow to be able to make out the details in them, however in doing so any area of highlight will collect so much light that they will appear to just be completely white or “blown out.” This is a real balancing act.
When we deliberately under expose by a stop in order to later push the film, a lot of light is still being collected from the scene. It is a common misconception or misunderstanding that when an image is underexposed everything is just dark. Of course, we are not collecting an ideal amount of light but there is more than enough to make an image from.
The consequence of controlled under exposure is that areas of shadow will be more dense and we can recover less detail from these areas. As we know, there is always a positive to balance any negative, and in this case we gain the ability to achieve more detail in areas of highlight by underexposing the image.
You cannot just do this forever. If you push a film too far then there simply won’t be enough light hitting the film to cause a reasonable level of reaction in the silver halides to create a recognisable image. What eventually happens is you get an insanely grainy image and all usable detail is lost.
The same is true for pulling, eventually so much of the film is exposed to light that you end up with a mainly white final image.
Film, though, really is quite special. It has such an insane level of latitude that you can under or over expose film by an absurd amount and still get something that you can call an image out of it. This is illustrated perfectly in the wonderful videos found on the YouTube channel “attic darkroom” which I highly recommend. Here are two videos that show you exactly what happens when you push and pull to the absolute extremes:
Push processing

When we come to develop a film that requires pushing (has been underexposed) it is necessary to either increase the time the film is in developer or to increase to the temperature of the developer – both achieve the same effect. If we fail to do this then the developed images will simply be underexposed and it would be far more difficult or impossible to recover lost details in post processing or printing.
The development of film is a chemical reaction and like all reactions they take time. Roughly speaking, the longer you leave a film in developer the more of the exposed silver crystals will be turned to pure black. When a film is developed for the normal or expected length of time, most but not all of the exposed crystals will be converted to black – there is some room for error here.
Pushing a film in development means that we allow the developer more time to react with more of the exposed crystals and therefore “pull out” the detail we lost by exposing for a shorter time. Those areas of film that received less than the ideal amount of light will still be visible as the crystals that did receive exposure will be more likely to turn black in the developing solution.

If you watched the videos above you’ll have realised that as film is pushed or over developed it produces a more binary image – there is black, white and not much in between. The level of this look that you desire will dictate how much you are prepared to push a film and still achieve desirable results. Pulling has the opposite effect, gradually there is less and less density or areas of black in the final image as proportionally fewer of the halide crystals are turned into those pure black silver specs.
As an aside, this is completely different to how different ISO and sensitivity levels are achieved on a digital camera. In very simple terms, because a digital imaging sensor is an array of light sensors, to achieve higher sensitivities to light you simply have to increase the gain of each sensor. Who knew that in doing so you’d introduce the exact same problem as encountered with film – noise. As ever with digital technology, manufacturers have found ever more incredible ways of processing the signal from image sensors and reducing noise to the point where you can basically get a camera to see in the dark.
Conclusions and learning

When it comes to flexibility, digital photography has the massive, undeniable advantage of allowing an appropriate ISO setting to be selected for each and every frame. At first glance, film seems really restrictive in that once loaded your speed is set for the next 24 to 36 frames. Whilst you are still making a decision at the start of each roll, the ability to push the boundaries of standard film speeds unlocks a world of creative possibilities and simultaneously allows shooting in conditions that would otherwise be impractical or even impossible.
When digging a little deeper it suddenly becomes apparent that although film is an ancient technology by modern standards, it has an unbelievable level of tolerance for abuse, mistakes and creative license. A push or pull of one or even two stops is usually so negligible that most untrained eyes wouldn’t have a clue anything had happened. It is reasonable to push an ISO 400 film to 1600 and specialist films like Ilford Delta 3200 to at least 3200 or 6400. At those kinds of speeds you’re able to shoot indoors in really quite poor light.
Black and white film emulsions are really forgiving and I’ve certainly learned that there is nothing to be afraid of in terms of pushing the stated ability of my favourite films. Indeed, should I need to I’d think nothing of pushing much further than I have already if the situation called for it.

I am not a photographer that is chasing grain or noise in my images. It can certainly add to the atmosphere of particularly gritty or moving scenes, but I don’t want to be overwhelmed by grain. There is a limit to everything and as with most things, push and pull processing should be done in moderation.
I love the look and feel of film images and being able to see subtle grain structure. This is something that even today digital cameras and Photoshop have failed to reproduce. The additional contrast offered by a subtle push of a film stock goes a long way to enhancing the look of those final images and used creatively is just another tool in a film photographers box of tricks.
I’ve learned absurd amount about film, how it works and the chemical reactions behind the images that pop out of my scanner. If you’ve made it this far, I hope you’ve enjoyed the journey too and now we all know what’s going on when we shoot, push, pull and develop our films.
References and Resources
I learned a lot from multiple sources for this article, but the most influential are listed below:
- Photo Chemistry – University of Houston
- Chemistry and the Black and White Process – Tim Johnson – University of Wisconsin
- Chemistry Explained – Photography
- Film Sensitometry – Kodak