
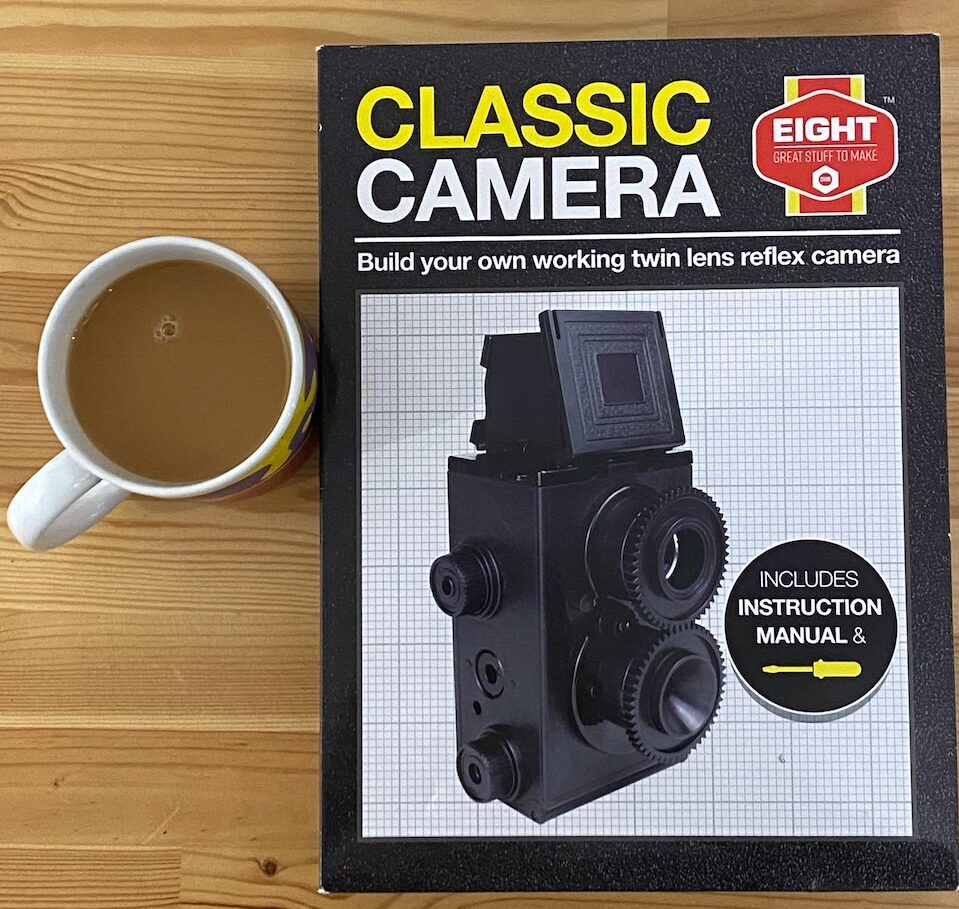
The Classic Camera kit is designed and manufactured by a British toy company called “Eight Innovation LTD” who also produce the identical Haynes branded version. It retails for around £20 if you buy it new but can be found on sites like eBay and Vinted for more like £5-10. The final, fully built camera is a plastic fantastic TLR with one quite useful twist – it takes 35mm film rather than the standard 120 format for pretty much every other TLR ever produced.
The kit itself has been around for a long time, at least as far back as 2014 which makes it nigh on 10 years old, which is odd because I’d never even heard of it until a few weeks ago. Still, if something has been in production that long you’d presume it must be at least worth the hassle of putting together, right?
There’s only one way to find out and that’s to buy one and put it together.
in this post:
What do you get for your money?
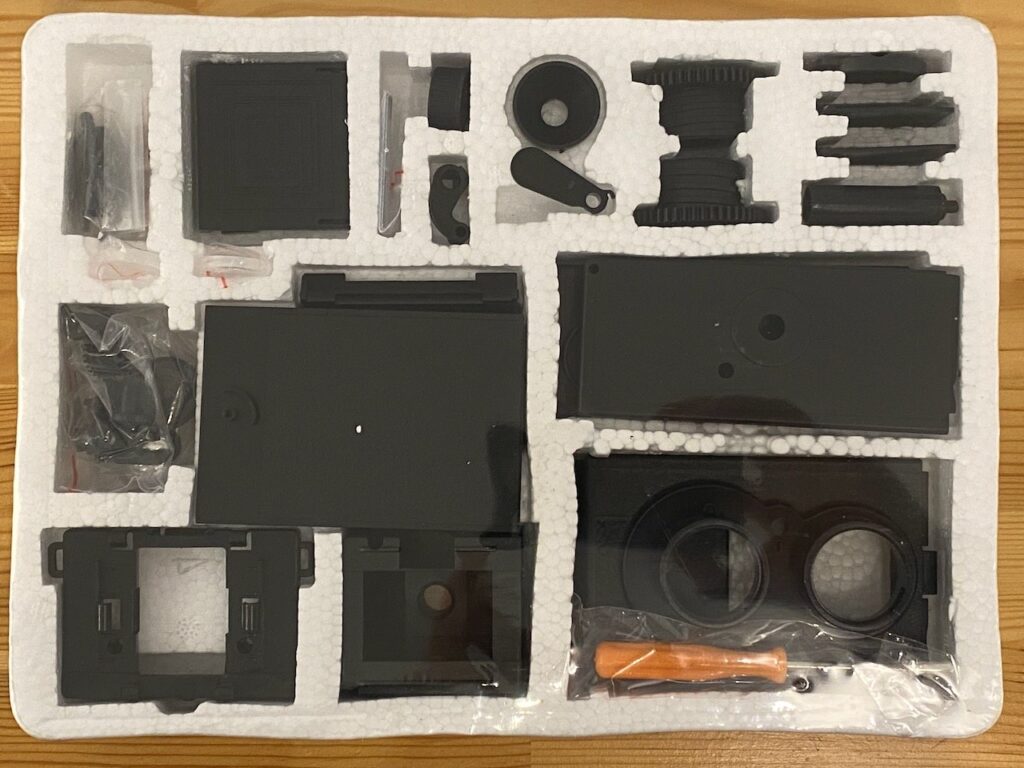
At first glance, quite a nice little kit. The packaging is nice, everything is neat and organised inside and small parts that are easy to lose come in their own little ziplock bag. There’s also a screwdriver included which is perfectly adequate for the job, is very slighlty magnetised and fits the screw heads perfectly. You wouldn’t expect much less – but then if you’ve ever tried to assemble Ikea furniture with the included tools you’ll know it’s often better to just put them in the recycling and get your own tools out. I decided to go for the full kit experience and only use the things supplied.
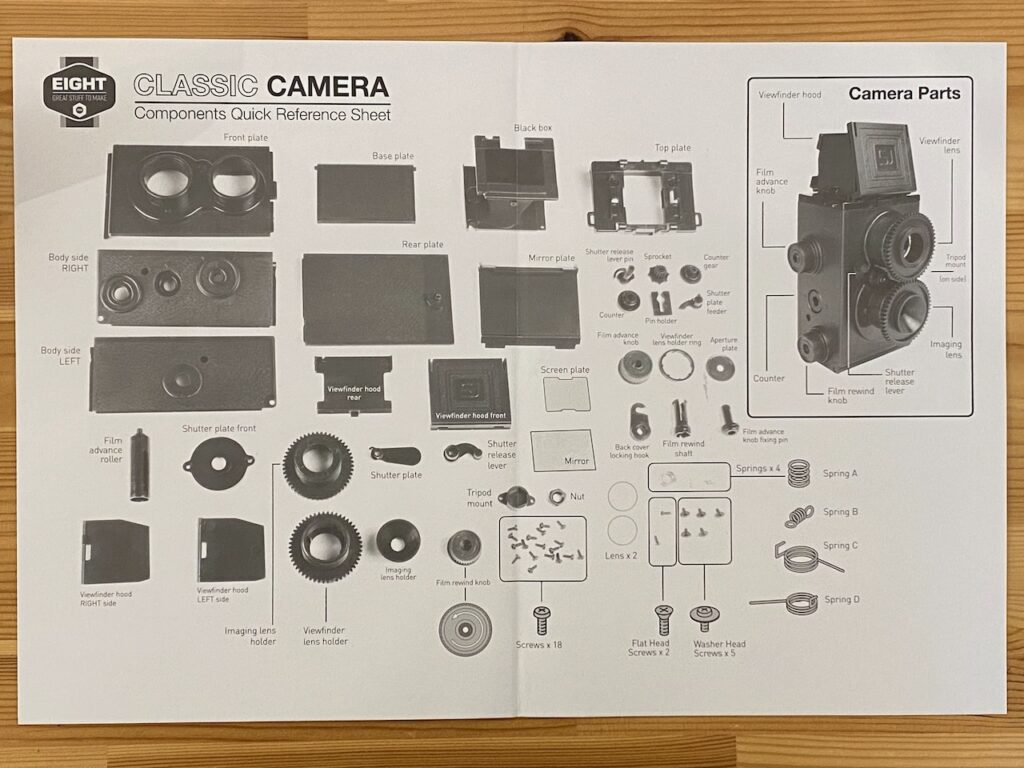
Finally, there are a couple of A4 leaflets / booklets inside, one of which shows you the name of each part and the other contains the instructions.
The kit is entirely made of plastic, the only exception being the screws and springs. The quality is above “scary brittle cheap” plastic and just below “solid enough.” The most important thing when putting something like this together is to be really careful not to force the screws or do them up too tight, if you do they’ll happily produce you a nice curly bit of plastic and then spin freely around in the holes they’re meant to be gripping.
According to the Eight Innovation website, their little kit is “brilliant” if you ask the Guardian newspaper. Then again, you might as well ask the cat what it thinks if you’re going to consult any newspaper for a remotely trustworthy, in depth or knowledgeable review of anything.

There is far too much of this nonsense “reviewing” going on and surprisingly newspapers are some of the absolute worst offenders. They’ll repeatedly curate gift lists, top 10’s and so on without actually having ever used the products they’re talking about. It’s painfully obvious after a few minutes research that there is a circle of content where “reviewers” look at each others content and simply reproduce it. Never was this more evident than the absolute nonsense spoken about the Instax Mini 11 by one certain newspaper…
Sadly, then, it is becoming harder and harder to actually find any source of information about products that can actually be trusted. Anyone who makes their living from content creation, whether a large newspaper or a smaller scale production, is going to think twice about slagging off their source of income. Furthermore, the kind of tests which reveal real life issues are even more sparse because of the pressure to perform a quick turn around to get content out – so long as a product works for a week it’ll usually be ok.
Fortunately I’m too stupid to turn any of my interests into a revenue stream so you can rest assured no one is in the slightest bit interested in giving me any incentive to say nice things about a product.
The build begins
 | 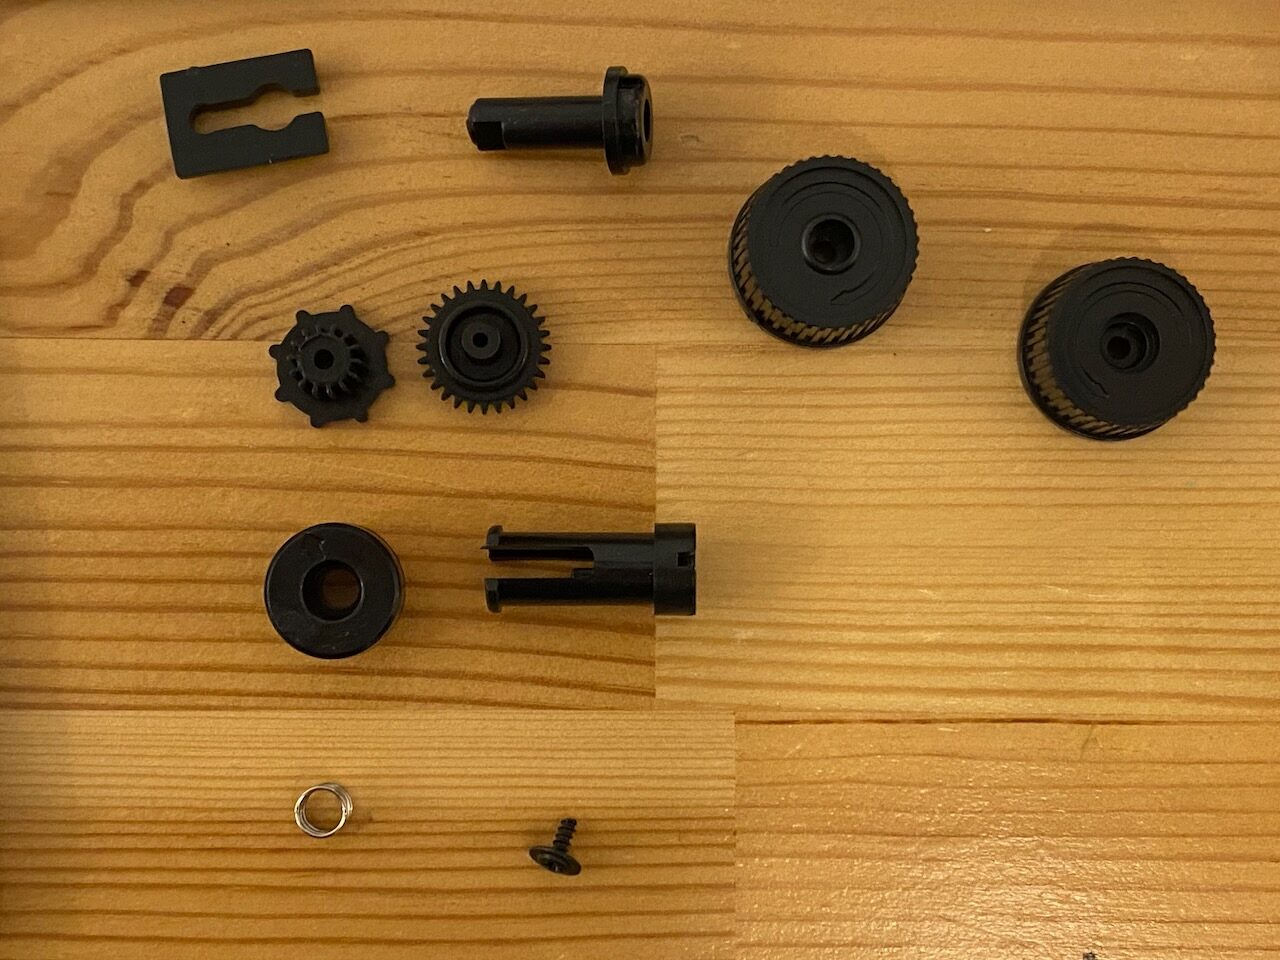 |
The build started off quite well. Initially there’s a lot of searching about the place for the right parts as they’re all in different bags when you might expect them to be together. The instructions casually make reference to a part you can’t quite make out in the picture and then you’ve got to consult the other sheet which shows what each part is called before digging around in the various bags to find the right one. Some parts are so similar, like the winding knobs, that you really have to squint at the picture for a minute before you spot the subtle difference between each one.
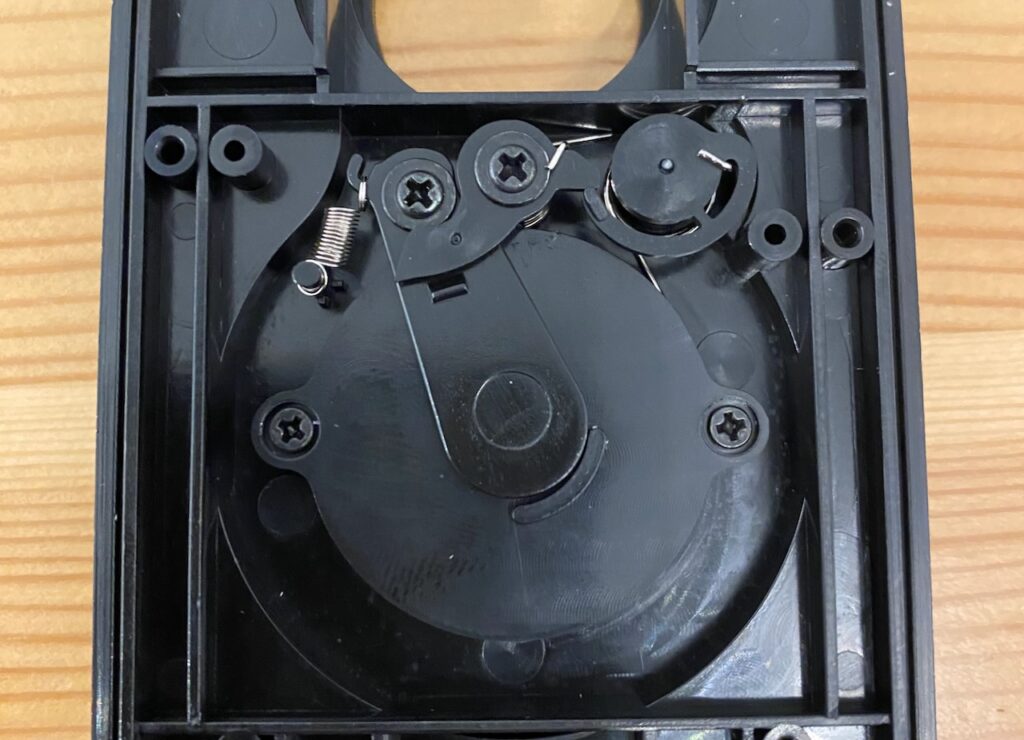
The camera goes together quite well until you get to the shutter mechanism. The shutter is operated by three components – a lever, a catch and the shutter itself. Everything pivots around a plastic bushing or is held down by a screw and the resistance / return motion is provided by a collection of three springs. To get the shutter to work properly, you have to adjust two screws until the components are held on with juuuust enough tension that they move around freely, but not enough that the tiny plastic catch which returns the shutter blade gets overridden.
Hmm.
The instructions are not helpful here in the slightest. It states that the shutter should complete both open and closing movements on the downward stroke of the shutter lever, only this seems physically impossible. I spent a long time adjusting the various screws here trying to get the shutter to operate in the correct way and it seems many other people have had the same issue – there’s a video on YouTube that gets referred to a lot, with many comments underneath along the lines of “I ended up with a broken shutter” and “mine still doesn’t work as it says it should.” 0/10 for the clarity of instructions here.
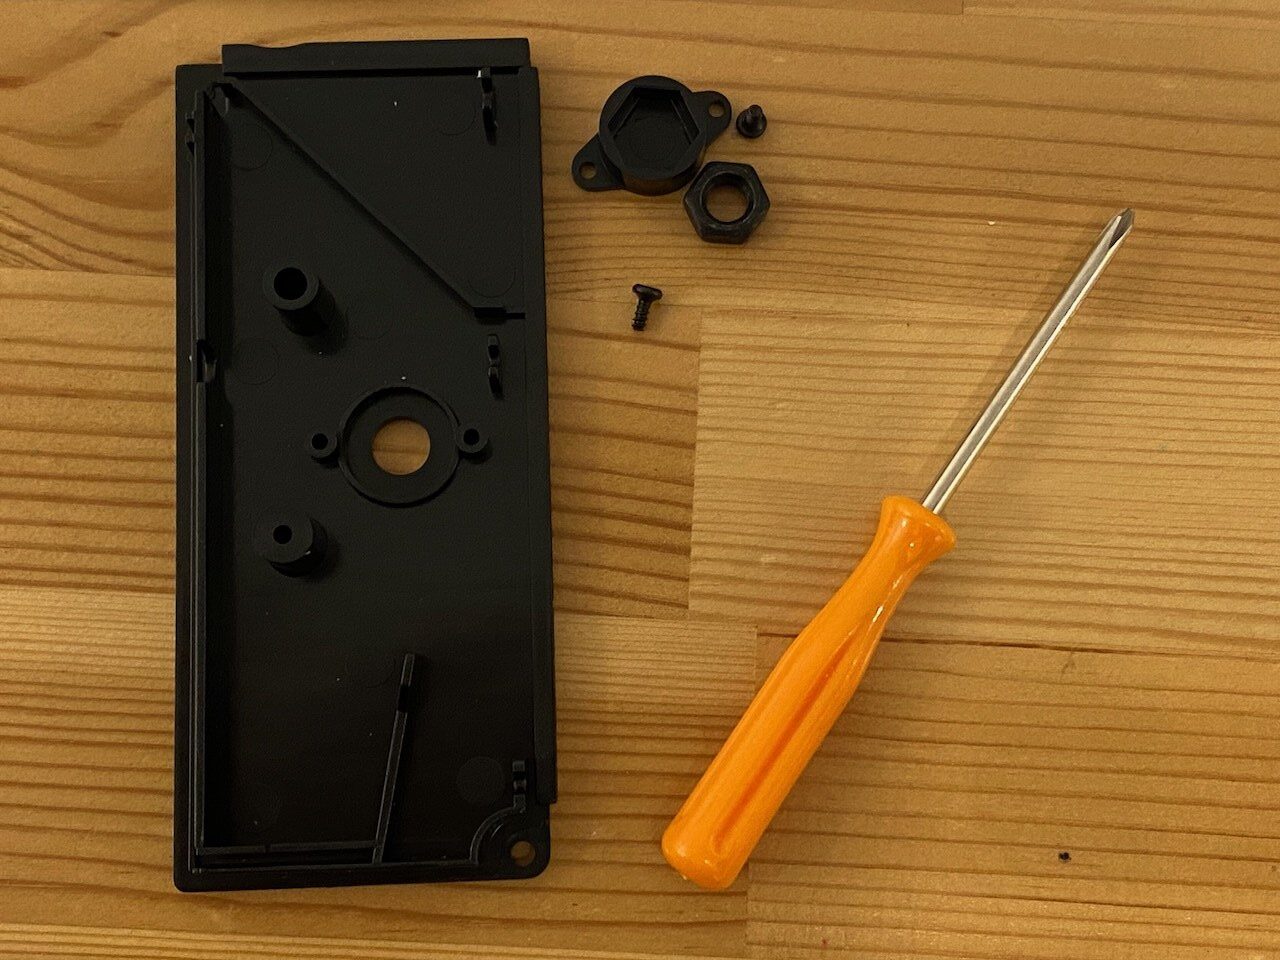
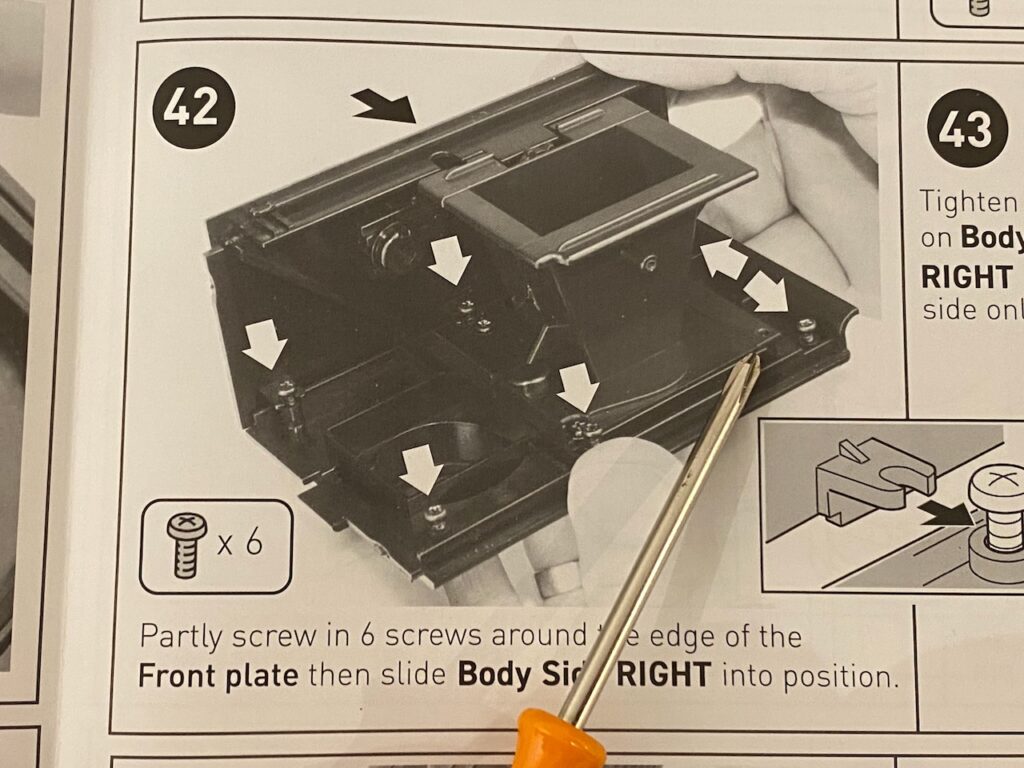
The instructions start to fall off a cliff after this point. There are several steps that, if you followed to the letter, either don’t work or would drive you totally mad. After the shutter assembly is complete, things start to go together quite quickly, the sides are next and, if you’re like me, you’ll make the mistake of screwing both sides on before reading the next steps properly…
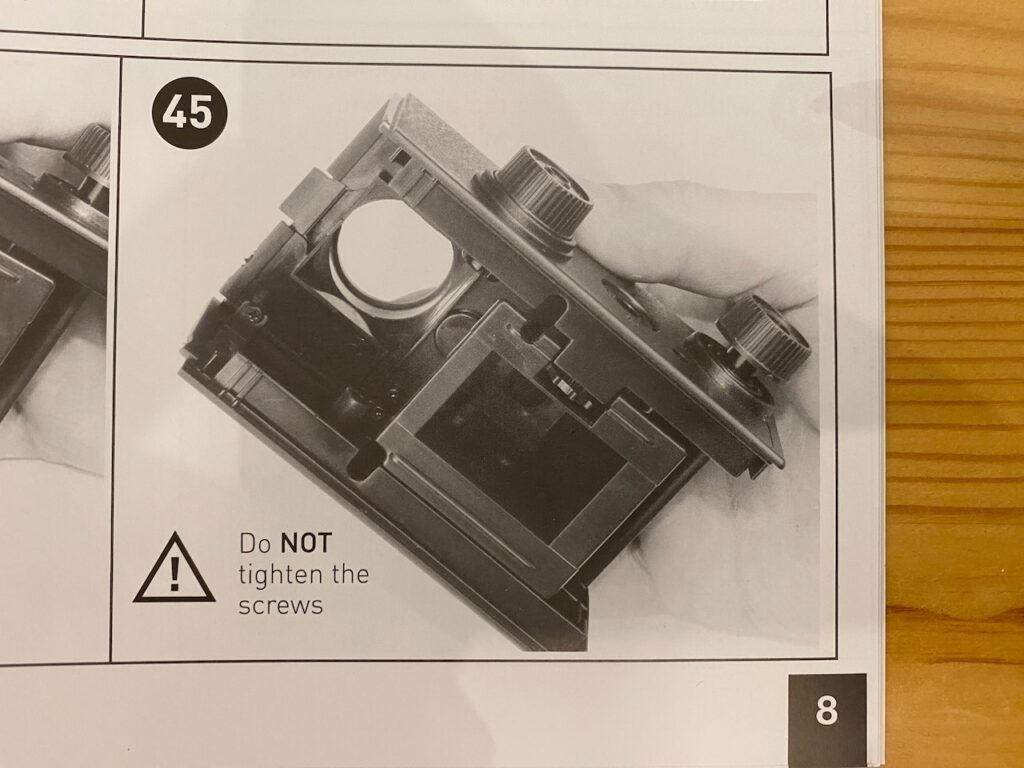
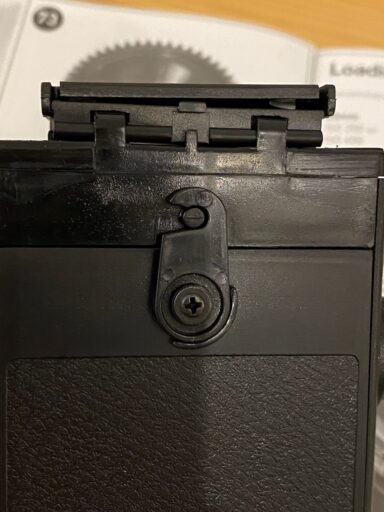
Once one side is on, you’re then meant to pivot the other side against some semi-tightened screws in order to clip in the film roller, bottom cover and mirror assembly. Let me save you the time now, there is no way on earth you can do this without either snapping off one of the plastic tabs or just going round the bend as bits ping off or fall out. The right side of the camera has a plastic lip that forms part of the light seal and this severely limits the side to side movement you’ve got if you have screws in as instructed to. It is better to simply leave them out, put all the pieces in and screw it up later. The mirror assembly physically does not fit in if you try to “gently slide” it in as it asks you to.
The camera is almost complete at this point and that’s where I hit a few quality and plastic moulding issues. The top of the camera contains a four piece, pop up plastic viewfinder cover. These are all clip in plastic pieces and three of the four went in just fine, the fourth… no chance. I tried several times and different ways in case I’d been missing something or done something stupid, but it really wasn’t going in. I pressed so hard and all I achieved were some rather nice indents in my thumbs.
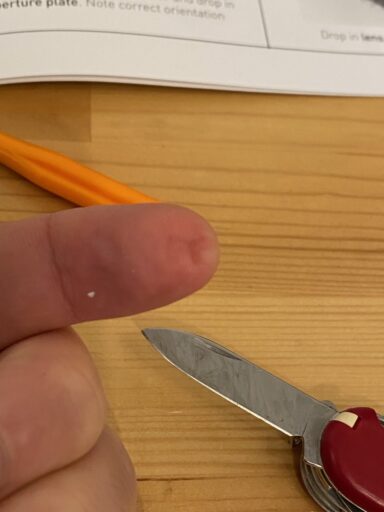
Eventually I resorted to trimming out some of the plastic with a knife which solved the problem. There were a few other bits of excess plastic that needed to be chipped off as well, but it didn’t help the final assembly fit together any better – once complete the top is meant to cover the viewfinder pieces and clip down to stop them flapping about It will clip on one side, or the other, but not both at once. You take your pick which lop-sided look you want to go for.
At this point you’re on the home run with only the lenses themselves left to put in place. This was probably the most painless and easy part of the whole build. They clip together quite nicely and then screw in to place once finished and that’s it – you’re ready to load a test film.
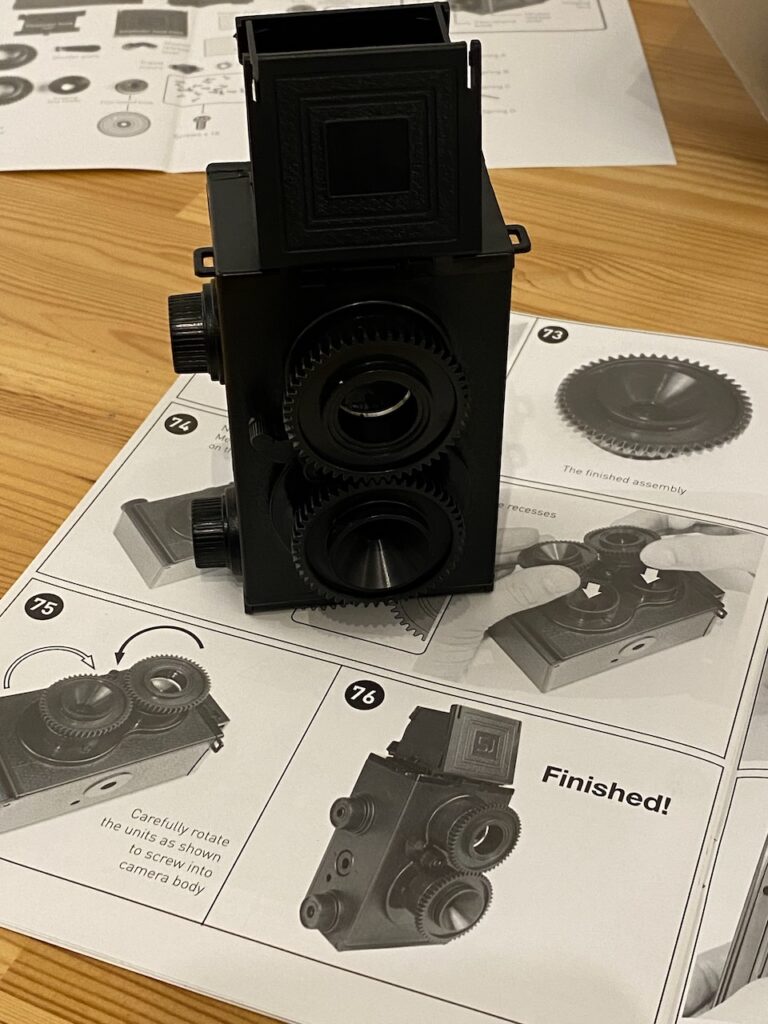
Finished…
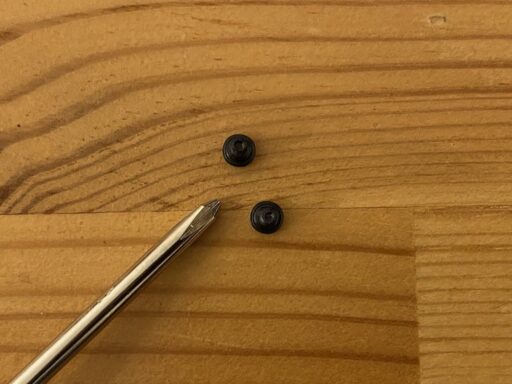
Yep. I had some screws left over, but I’d followed the instructions to the letter. Hadn’t I?
I went back and had a look at the instructions for a while before I realised I didn’t remember putting four screws in the box that attached over the shutter assembly. How could I forget? Well, it just so happens that you’re never actually told to put them in. You put the first two in as instructed and then presume the other two come later for some reason, only they don’t. They do magically appear later on, though…
I’ve been back through the instructions a number of times, this step is definitely not there. You’d have thought in the 10 years this has been on sale that someone would’ve let them know? Clearly not, but fortunately you can just reach in after the camera is finished and put these in at an angle and it works fine.
In use
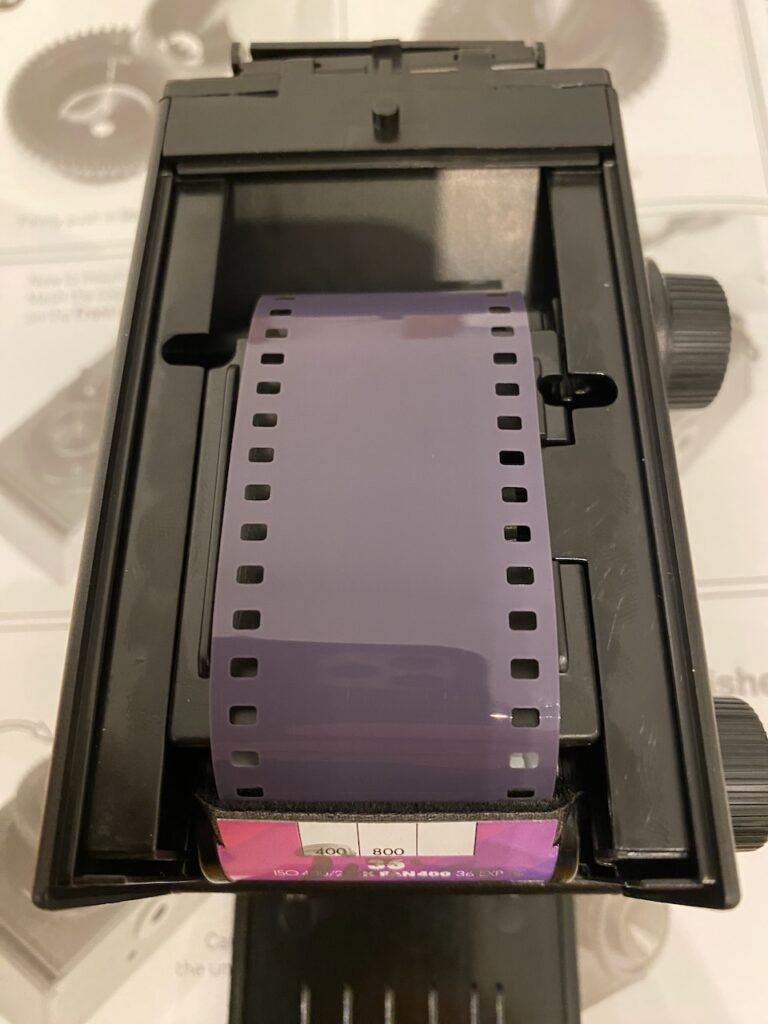
Loading film in this camera is janky. There is nothing to hold the film on one side so it just flops around a bit in the camera whilst you try to attach the other end to the smallest tooth in the world that is meant to grip the leader and help wind the film on. You’re doing this while trying to hold the film flat as well, which never actually happens. I resorted to winding the film on until it had taken, flattening it the best I could and then just closing the back and checking if everything worked – which miraculously it seemed to do.
So, where are the test shots? Well, that’s a very good question.
Having built the kit, I left it for a month or so before finally taking it out to use. In bright daylight, the focusing screen was nice and bright. I framed up a shot, pressed the shutter and… nothing. I flicked the shutter a few times and absolutely nothing was happening – or at least that I could see. I thought I’d wind the film on and try another shot and it was then that the camera advanced a couple of sprocket holes before completely jamming.
Honestly, by this point I’d very quickly decided to just give up. It isn’t often that I turn down the chance to diagnose and repair something, but the truth here is that the camera just isn’t very well designed and it isn’t worth it. There are three things that make this an unpredictable camera at best. First, the film can isn’t held in on both sides resulting in it being almost impossible to lay the film flat and taught before closing the back of the camera. Second, the single tooth that holds the film leader in on the take-up spool is so small it will regularly fall off if not wound perfectly before closing the back and finally, the gear which is supposed to turn the film advance indicator is just too shallow. When you wind the film it’s pot luck as to whether it turns as it should.
With these things in mind, the love for this camera and will to go out and shoot it had drained out of me.
Conclusions and Learning
Well, what did I really expect for £5 and some plastic bits and pieces?
The build was fun, I like putting things together and that was always going to be a large part of the enjoyment with this kit. The parts themselves are reasonably well engineered for the price point of the kit, but the quality control is poor as I found out when I had to shave one or two pieces so they’d fit together properly.
The plastic is “ok” but I’d be very careful if you’re heavy handed with a screwdriver and the viewfinder hood was an absolute nightmare to put together due to poor tolerances in the plastic moulding.
The camera is definitely flawed, there’s an interesting video here from a guy who built one and had pretty much the exact same experience as me during the build. He also comments on the fact the film advance indicator simply doesn’t work but he did manage to successfully get a roll of film through his, so it’s well worth a watch to see what the camera produces.
Should you buy this kit? No. No you shouldn’t, not if you want to use it as a camera. The results are awful and that’s if you can get it to reliably go through a roll without jamming or falling apart. If you want to use it like an Airfix kit and simply enjoy the build process and then put it on a shelf as a novelty then… sure. If you can find it for £5 then it’s worth it for that price. But please, don’t spend £20 on it and certainly don’t waste a roll of film in this thing.
Share this post:


Started reading this and the excitement mounted, I thought what an exciting project, and then…….thankfully I read the post to the end. So, as they say on “Dragon’s Den”, “I wont be investing , I am out”. But so disappointed as it was a kit that looked challenging but would work. Thank you for yet another interesting article.