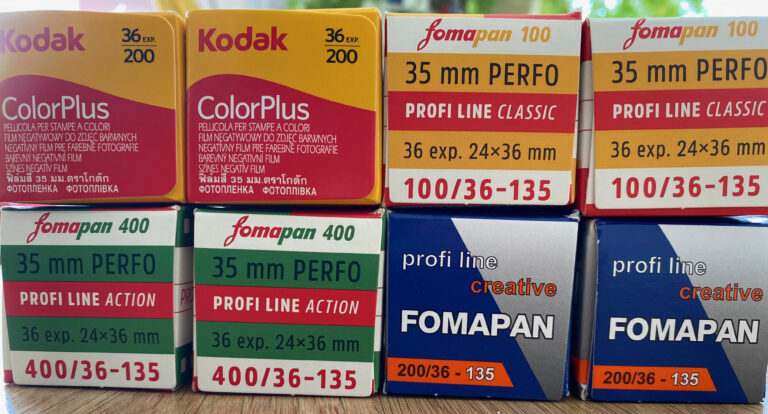
Since I returned to film photography a few years back, I’ve been on a mission to do the whole thing on a budget. Price wise, buying film and shooting it isn’t too bad, you can still buy black and white for around £5 a roll. Developing is super cheap too, a bottle of Rodinal will cost around £11 and can develop over 80 rolls and you don’t need to replace fixer every six weeks as it says on the side of the bottles – I’ve had fixer last a year before replacing it.
The real issue comes once you’ve got your negatives. At that point you can either hit the darkroom and make prints, or compromise and digitise your negatives. That gives you two further choices – buy a scanner or do DSLR scanning and this is where things go from simple to stupidly complicated.
I’ve come to one very simple conclusion after 4-5 years of experimenting and that is there is no one perfect solution. There are compromises or hurdles to overcome no matter what you do, but is there a best compromise? I think there possibly is…
In this post:
The options
I’ve talked about scanners on more than one occasion and the short version is “ignorance is bliss.” To cut to the chase, if you only scan the occasional roll of film and can find a scanner for relatively little money then honestly, it’s probably the most sensible choice. Of course, you can pay your local film lab to scan for you, but this adds a few quid to each roll you develop and development prices are not cheap. Locally, and I do prefer to support a small business based where I live, I pay £10 per roll of colour film for development only, making each roll of colour film a £20 investment. That’s a lot, so any savings on top of that are welcomed.
The caveat to using a dedicated film scanner is price and obsolescence. The best consumer (not lab) film scanners ever made were produced by Nikon and retailed when new for around £800 to £1000. That’s not an insignificant sum and clearly makes them suitable only for those who are totally invested in film photography. Today, you’ll pay… the exact same amount for one, even though they are well over 20 years old by now.

There are almost no new scanners available, and those which are “new” are based on designs released around ten years ago and they’ve not been updated since. One of those is the venerable Epson V600 which I made the mistake of buying a few years ago and, despite initially being quite happy with it, discovered later that it was… not great. Why? Because for the £300 it costs to buy one, the results are entirely variable and even when they’re “spot on” the quality of images is really not acceptable for the price of the scanner.
This effectively leaves all but those with the deepest pockets in a difficult situation. For the casual film user, you can try your hand at eBay and pick up a reasonable scanner from Canon, Epson or Minolta for less than £100 if you’re lucky but you’ll have to battle with old interfaces, outdated software and drivers (yes, I know, 3rd party scanning software exists) and limited ability to scan film other than 35mm. I think the flatbed scanner market is effectively, as of now, dead. You could try one of the super cheap supermarket specials or the “Kodak” branded Amazon 35mm film scanners but these really do produce awful, awful scans and are just not worth it.
The scanners don’t work, they just make you worse
So where does the budget conscious film user go next? The answer seems obvious – DSLR scanning.
This is not an insignificant investment. Believe it or not, there are plenty of photographers out there who do not own a DSLR. There is almost an assumption that everyone who uses a film camera must have a DSLR stashed in a cupboard somewhere. Of course, I’ve proven multiple times that you can buy old cameras for very little so getting your foot in the door isn’t too much of an investment, but you’re going to need a minimum of 8mp, preferably 12 or more to make it worth your while and out perform a scanner in terms of resolution. I think if you’re patient, you can pick a suitable camera body up for around £50.
To muddy the waters further, film scanning on a DSLR relies a lot on accurate focusing. Cropped sensor bodies, which are always cheaper to buy, have rather small viewfinders and you’re not going to get one with live view and focus peeking if you’re on anything like a reasonable budget. Therefore you may wish to invest in a full frame camera or a newer crop sensor body with these focus peeking features. This ups your budget for the camera alone to more than £100.
Once you have a camera you now need a macro lens. Yes, you can get away with extension tubes and this is definitely the ultimate budget way to go, but a dedicated 1:1 macro lens certainly makes life a little more convenient. Modern macro lenses are expensive and absolutely not “budget” in any sense of the word. If you were to buy a 100mm macro (which seems a popular choice) or perhaps a 50mm, you’ll need the best part of £200 for a second hand copy. This now takes your total spend to around the £250-300 mark.
I decided to stick to my guns and buy an older macro lens that had received rave reviews during its day – the Sigma 50mm F2.8 Macro.

I paid all of £56 which for a lens is not a great deal of money at all and you would pay the same if not more for any “nifty fifty” you care to name. This is a really very well made lens that does indeed produce wonderfully sharp images with that magical 1:1 focussing ability. £56 is a good price for one of these, expect to pay around £60-90 for one without damage or fungus.
These two hurdles overcome, I now had the main equipment to “scan” my negatives using a DSLR using my trusty 5D Mark I and, more recently, Mark III. I did the quickest, dirtiest test using a film holder from a scanner, an ipad as a light source and my charity shop tripod. Cobbled together the results were… incredible. I honestly could not believe the difference in quality.

Sorted, then? For roughly £100 if you’re lucky or £250-300 if you’re realistic and want some creature comforts, you’ve got a great scanning set up, right? Well… no. Nothing is that simple, is it?
Wait, we’ve not finished shopping…
Cards on the table, if you really wanted to you could just do the dodgy iPad and film holder job and be done with it. You’d definitely get better results than a £300 flatbed scanner will give you, but it’s fiddly as hell and you’ll spend a lot of time carefully balancing negatives in just the right place under your camera. Just because you can do something doesn’t mean you necessarily should.
One of the key benefits of DSLR scanning is the ability to take a full roll of developed film and scan it all in one go. You don’t need to cut it in to strips, just slide it past your lens snapping away as you go. To do this you need something to hold the film flat and there are a lot of options.
The cheapest of the cheap is to buy two pieces of glass and sandwich your negatives between the plates on top of your chosen light source. I tried this out and it worked rather well, but with a couple of significant drawbacks. The primary one is the glass is large and cumbersome which makes moving from one frame to the next quite difficult and the secondary issue is you keep trapping dust between the glass and negative which you can’t easily get rid of before post processing.

Neither of these issues were what finally killed off this approach for me, though, in the end it was the dreaded Newton rings. If you don’t know what they are, they look like this…

I’ve no idea why this started to happen as I scanned two films without issue and then suddenly any film I put in there instantly created rings everywhere. I tried a few things to separate the glass but it didn’t work and any more separation would’ve resulted in the negatives curling which is something of an issue – at the macro level any kind of bending of the film doesn’t help your focus or depth of field.
Oh and during this time I’d bought a proper light source – a Cinestill light box that set me back £40.
What to do? Well, the MacGyver in me set about trying to some up with something else that would hold negatives flat without costing a fortune. I first turned to the 3D printing world and no, I didn’t have a 3D printer but did manage to borrow one from work that was quite literally gathering dust. After resurrecting it I printed several copies of a negative holder project. Despite fiddling with settings, print speeds, temperatures and more, all I ever got were prints that were not accurate enough to be useful.

3D printing is an art form in itself. I toyed with the idea of getting it printed by a professional company but the cost would’ve been around £20 – 30 and there’s no guarantee it’d be bang on – it probably would’ve been, but it was a risk nonetheless. It was then that I turned to the recycle bin.
The goal is to create something that you can feed a film through, holds itself flat and has a hole in it for the light to shine through. How hard can it be? The answer is not too hard at all. After 10 minutes with a ruler, knife and some glue I had this absolute beauty:

That’s not one, but two carefully measured, cut and stuck pieces of Crunchy Nut Cornflake box. I know, you’re thinking “what a load of crap!” and… you’re wrong. This works and works very well. It holds the negatives flat, allows you to smoothly pull the roll through one frame after another and doesn’t scratch the negatives. This is the solution!
Well, perhaps It might be. Cereal box cardboard is quite fibrous and, you guessed it, deposits dust on the negatives. You can blow it out quite effectively but getting underneath is a bit of a mission once it’s taped down – and you do need to tape it down or it flaps about the place. You might laugh but I couldn’t believe how effective this cereal box solution was.
So why isn’t this the solution I settled on? Why not just knock it up out of higher quality materials and be done with it? I’m asking myself the same question. With a little investment in posh cardboard or perhaps some thin plastic I could definitely make a “mark two” version and it’d probably be good enough for a bodge merchant like me. It would be a bit of an issue if I ever wanted to scan 120 film, though. If I had access to a laser cutter and invested some time, I could definitely have designed a more permanent version of this cardboard wonder.
It was then that I discovered someone with a laser cutter has already done just that.
The final solution?

There are times when you have to admit that doing it yourself isn’t worth the time and effort. I could’ve gone and found someone or somewhere with a laser cutter, sat there designing prototypes and iterating through them refining as I went or, alternatively, if someone else has already done this you could just opt to benefit from the time they’ve invested in reaching the same conclusions.
This is where the Essential Film Holder or Valoi/Cinestill film holder come in. Both options are approximately the same cost and do the same thing just in different ways – however supplies of the Valoi seem to be variable unless you buy it as a kit with the backlight (which I already had). In hindsight, I should’ve bought the two together.
The essential film holder is £65 for a “DIY” kit, or £90 if you want someone to screw four nuts and bolts together for you. Honestly, I think the Essential Film Holder pricing is… verging on a joke. It is made from perspex sheets that are laser cut to size and held together with Nylon nuts and bolts. I understand the paying people for labour and machinery running costs etc, but they’ve sold a lot of these kits and the total bill of materials for one kit works out roughly as £10 in perspex sheets. If their total costs for one film holder is more than £15 at retail prices then I’ll eat my hat along with yours too.
In fairness, the EFH at £60 provides you with 120 and 35mm scanning, but you need to supply your own light. £60 will get you the Cinestill light source and a 35mm holder. A 120 holder for the Cinestill system will set you back another £30, bringing the two equivalent systems up to roughly the same price. Of course, you can buy much cheaper light sources and commonly people invest in tracing lights designed for artists and I hear these do work quite well.
Honestly, quality wise, the Essential Film holder leaves you feeling very disappointed for the money. It’s got a very high school DT project feel about it rather than the well manufactured appearance of the Valoi kit. This has not put people off and the guy who makes them literally cannot keep up with the orders he’s receiving.
Does any of this matter if it works? Not really. I am, however, utterly amazed that the Chinese copycat versions haven’t appeared on Ali Express yet, it would be trivial for them to tool up and rip the design off and improve on it. If you can’t find copies of this system on design websites for free, I’d be surprised.
The proof is in the scanning
Regardless of build and component quality, if the film holder does the job well then it’s worth the investment, right? So it was time to test it out and this is where I learned more than I though I would about DSLR scanning.
In short, the Essential Film Holder does work, and it works perfectly well. It holds negatives perfectly flat, diffuses the already diffuse light from your light source and film slides nice and easily through it without ever scratching negatives. It does, however, require an absolutely perfect set up.
A lot of people who are serious about DSLR scanning will have a scanning rig which looks basically like an enlarger – this holds the camera perfectly level along with the film being scanned. I now understand why these exist but, and you might notice a theme here, these are wildly expensive.

Just a side note, this kit includes a negative holder which is completely identical to the 3D printed version I tried to make previously. Turns out it must be a good design after all.
With these kits out of the window for anyone but those with the deepest pockets, you’ve got to resort to a tripod. To cut a long story very short, I learned the following:
- You need a decent, very sturdy tripod. Cheap tripods will introduce camera shake, even on a 10 second self timer.
- Mirror slap is real and the vibrations can ruin an exposure.
- The film holder must, must, must be completely level on both the X and Z axis.
- Using ISO 200 enables higher shutter speeds that eliminate vibrations with crap tripods.

The levelling of the film holder is utterly essential. Initially I was seriously disappointed with the scans as they were all coming out with these weird light patches on the edge of each frame. It didn’t make sense at first as I’d never particularly bothered checking for level and hadn’t seen these effects happen before. I got to the point where I was almost ready to give up on the EFH as a bad choice before levelling things out fixed absolutely everything.

Finally, I’d been scanning negatives initially with the lowest ISO my camera supported to minimise the introduction of noise. Try as I might with self timers, avoiding any external vibrations and weighing down my crap tripod, I couldn’t stop camera shake destroying the scans at slower shutter speeds. Bumping the ISO to 200 at F8 gave me a shutter of 1/125 and that proved to be the perfect solution and no modern DSLR gives any noise at ISO 200 anyway.
When you get it all right, it works. It really does work and, yes, you can see down to the individual grains in the film if you zoom in to 100% on the final image. The process of “scanning” is way quicker than on a flatbed scanner and I’d say that the post processing time is roughly the same with the added advantage that you’re editing a far more forgiving RAW file rather than a TIFF out of a scanner.

I shot a roll of Foma 100 using my Canon EOS 1n and 17-40 F4 L to ensure the highest quality negatives I could produce in a hurry. I developed using Rodinal, 1:25 for 4 mins and then scanned the entire roll using my 5D Mark III, the Sigma 50mm macro mentioned earlier and then converted the negative images to positives using Adobe Camera RAW.
The results are nothing short of incredible. Other than inverting the levels and, in some frames, subtle tweaking of highlights and shadows, literally nothing needed to be done to produce sharp, clear and gloriously detailed images. Some of the final pictures are difficult to distinguish from a black and white image produced by a digital camera.

Conclusions and learning

Has film photography ever been cheap, really?
When film was photography, you had to pay processing and printing costs with every film. Of course, dark rooms were more popular, developer and equipment more readily available and I’m sure many people had every bit of kit they ever needed, but cheap it wasn’t.
Digitisation of negatives wasn’t even “a thing” until the rise of PC’s (lets forget about the Kodak Photo CD), cheap storage and eventually digital cameras came along and changed everything. Film scanners have been around seemingly forever but, as we know, prices are prohibitive for the kind of quality that does your negatives justice and yes, through bitter experience, I’ve learned that the quality of your scans does matter. Countless times over the past few years I’ve been disappointed with soft images or a lack of detail, thinking it was a mistake I’d made in camera when actually it was a fault of a scanner which didn’t cut it resolution wise and didn’t even have the ability to focus on negatives properly.

If I’ve learned one thing from this experience and literally years of trying to shoot and scan film on a budget it’s that if you’re going to bother investing the time and money into making beautiful images on film then you probably shouldn’t skimp when it comes to the final hurdle of realising those images on screen.
Film photography has never been quick and in this weird 50/50 analogue to digital split we have where we shoot film but then digitise the images, it is easy to forget that speed is not the goal. If scanning your negatives takes time, then so be it, but the process shouldn’t be frustrating or fiddly.
The cost of DSLR scanning will vary wildly depending on your circumstances, your expectations and your budget but ultimately you do not need to spend insane amounts to get very high quality negative scans. Above a certain price point, every pound you spend is giving you ever more diminishing returns. This is like the “audiophile” nutters who think that a £300 speaker cable produces better sound quality when physics says that’s total bullshit. You only need to look at products that “shave cd’s flat for better sound” to realise the level of stupidity at play in that market place.
To get really good DSLR scans, you’re going to need a minimum of the following:
- DSLR (duh), preferably full frame – £150 for a 5D Mark 1 would be a great start.
- Macro lens – £60 ish
- Tripod – literally any, £5 charity shop special but be prepared to deal with camera shake.
- Film holder – £60 regardless of which option you go for, or 3D print for roughly £20-25.
- Photoshop and perhaps some plugins – budget £600m for Photoshop subscriptions…

Software aside you can set yourself up for roughly £250-300 and whilst that’s not cheap, it is the same amount as buying a flatbed scanner that gives you awful results. In terms of value for money, its worth the initial investment.
Software is the other side of the coin here. Pretty much the entire world swears by Negative Lab Pro – it’ll set you back £100 on its own, but you cannot use it without Photoshop and that… that might be a deal breaker. For black and white, you really do not need it. For colour, yes, it’s going to save you an awful lot of fiddling around trying to remove the orange colour cast of the film base. Furthermore, Adobe are not in any way an ethical company and their subscription only model is screwing people out of large sums of cash in rather unfair ways to the point where they’re battling lawsuits in multiple countries over their dishonest selling methods.
I’m still churning out pictures on a copy of CS6, for which support ended a decade ago and is a version of Photoshop that came in shortly after the demise of the dinosaurs. However, you can do negative to positive conversions in Camera RAW and there are numerous tutorials for further tweaks in Photoshop itself. Colour is hard work, but black and white is child’s play and you really do not need any special software for those conversions and edits.
I’ve purchased and tried to love Affinity Photo 2 but I just cannot get used to it. Love or hate Adobe, they’ve got the workflow sorted – Bridge/Lightroom, Camera Raw and final tweaks in Photoshop is such a natural and sensible way to do things. Basic edits in Affinity drive me mad. I wanted to love it but it is still too convoluted and disjointed for me personally to make the switch.

Ultimately, the conclusion is that film photography on a budget is definitely possible but in the long term it will disappoint you. If you’re committed to film then you have to accept that there’s an investment that you’ll inevitably have to make if you want to truly get the best out of your negatives, and you should want to because the end results are so satisfying. Everyone drags out the same old tropes about film photography being expensive but worth it for the “feel” of film images, but there is truth in the fact that if you’re even remotely experienced in photography you can often tell a film image from a digital one and there’s that feel to the image that no matter how good AI and filters have become, they still can’t get away from that synthetic look.
Film is still worth it, you’ve just got to take your time and empty your bank account for it.
Just not on “high end” nonsense, there’s still some room for compromise.
I admit it, though, DSLR scanning is “the way” and I never thought I’d admit to that.