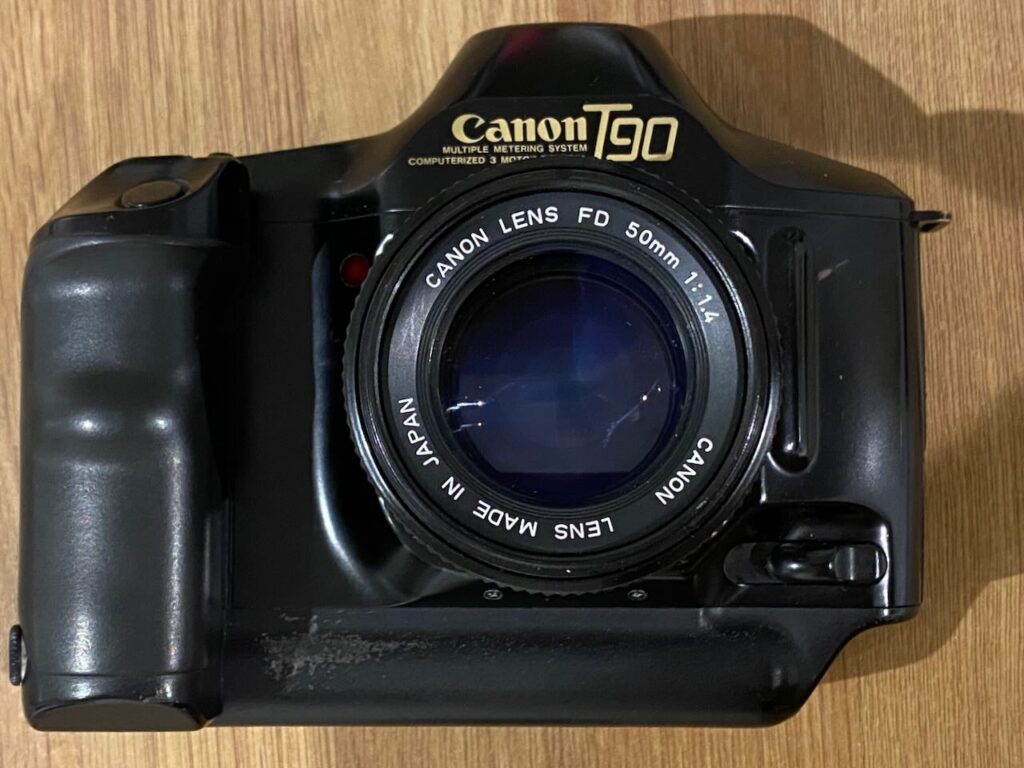
I’ve had a poor run of luck with camera equipment lately. A number of times I’ve gone out and suffered from shutter failures, film winders that refuse to wind any more and dealing with the disappointment of lost shots. I very quickly learned to take a backup camera with me whenever I went out and that backup was the Canon AE-1 Program with an FD 50mm F1.8.
My particular AE1 is from 1984, visit the excellent Vintage Camera Digest guide to date yours. As far as I know, in those 39 years it has never failed to function, even when its shutter started making that worrying squeaking noise that most old Canon A series cameras make after a while. During a recent photo walk, I quickly discovered the Canon 300V I had been using wasn’t actually winding on the film after each frame. Annoyed at missing yet more shots, I pulled the AE1 out and went into manual focus mode.
It’s been so long since I used the AE1 in any kind of serious way. It took a few frames to get used to the whole process of manual focussing and pre-focussing to a sensible level, but after that it all comes back to you very quickly. I’ll never grow tired of cranking the film advance lever after each frame, there’s something so satisfying and final about physically committing each frame to the film cannister.
Following on from this I felt it was time to invest some money into my Canon manual focus FD set up. I’ve got a number of FD based cameras coming up to test and review, and whilst my FD 50mm F1.8 isn’t exactly poor, the F1.4 version has quite the reputation for being an excellent lens. The 50mm F1.8 has been faithful, but mine is not in superb condition – the situation was ripe for an upgrade, an F1.4 type of upgrade. Knowing my luck, though, it was never going to be straightforward.
In this post:
Finding a 1.4
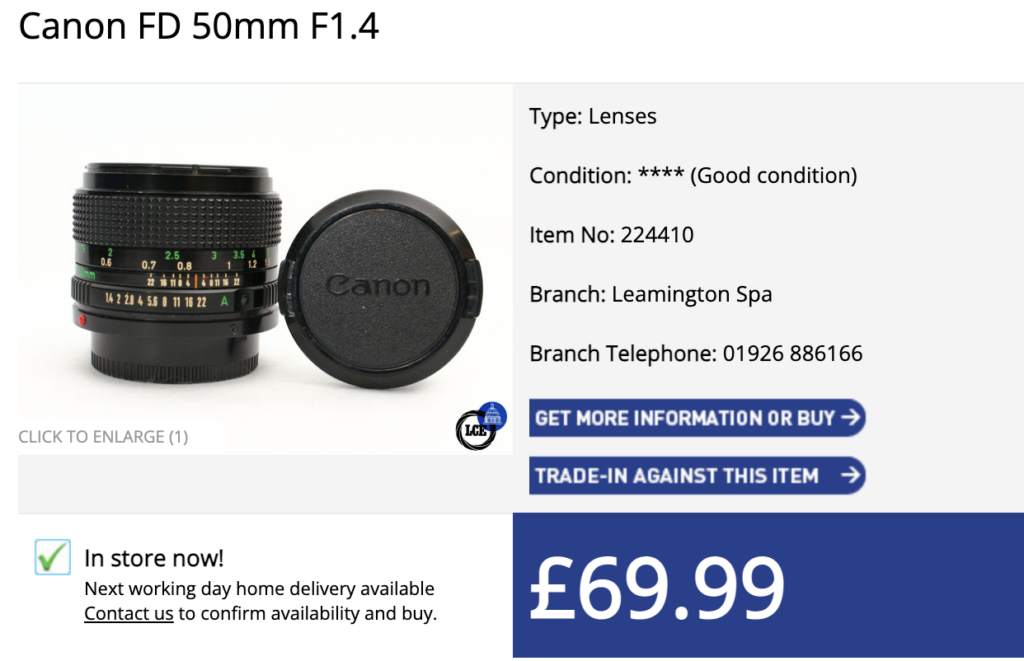
Other than the rarest and most exotic of lenses, the FD range has maintained fairly sensible second hand prices. That’s not to say people are not trying their luck, but the average selling price for a working 50m F1.4 is around the £60-£70 mark. I was all set to buy the one above from London Camera Exchange, but looking on eBay showed a couple of tempting options that might be even cheaper when making an offer.
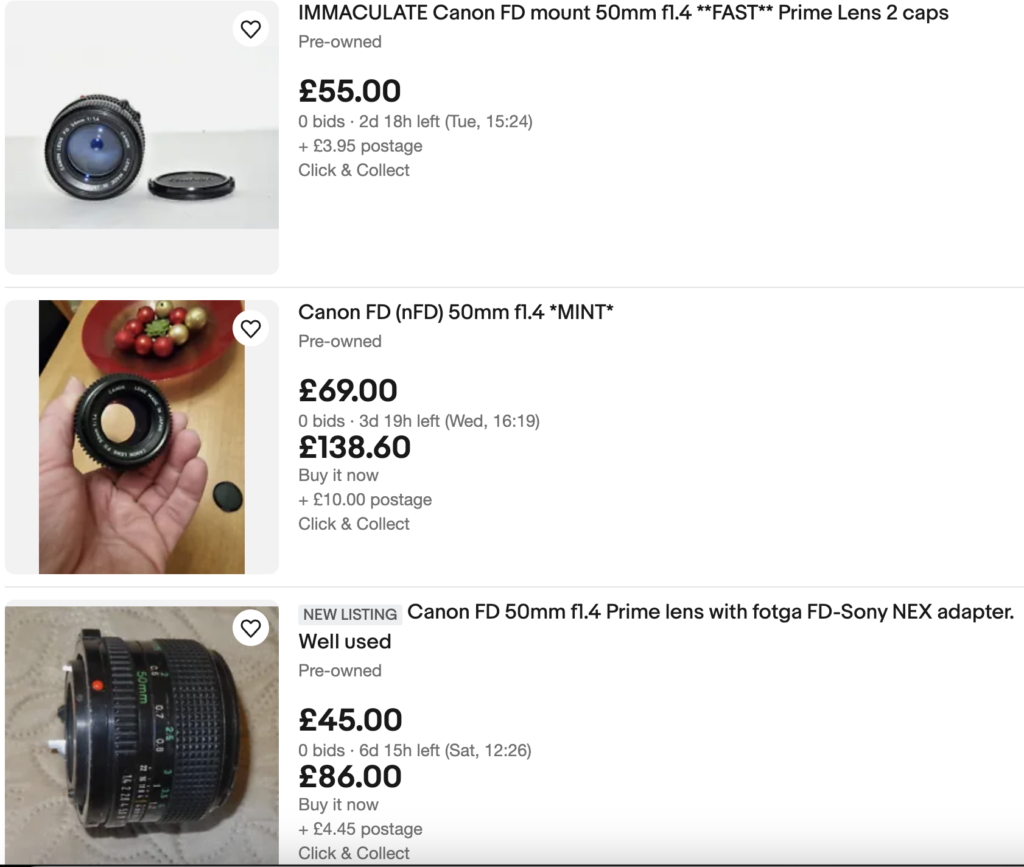
Presently, at the time of writing, there are a couple of options available for the same or similar prices to LCE but also plenty of the usual sellers who seem to think they are selling solid gold special editions. My advice would always be to buy from a reputable shop if prices are the same or close. There is no reason to put yourself through the potential misery and protracted process of returning items through eBay if you can get the same thing from a known, decent outlet that has everything to lose by misrepresenting an item.
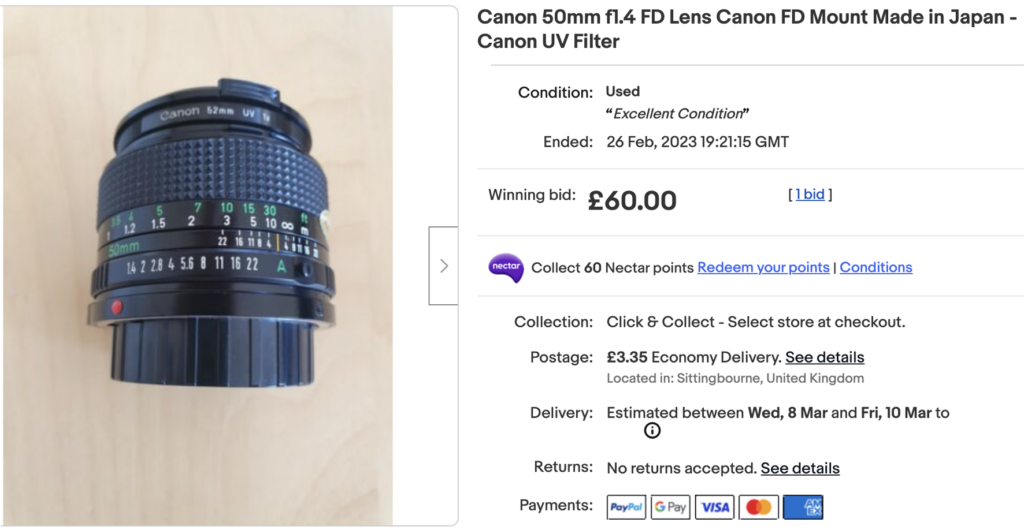
I found a 50mm 1.4 copy that looked to be in decent condition and was available for a reasonable price to begin with. I offered £50 and it was accepted almost a day later. The lens came quickly and seemed to be in incredible condition. The front lens elements were crystal clear with no evidence of dust, the barrel of the lens looks like it has never seen anything like serious use.
The rear elements, though, were a different story. Looking through the back of the lens showed up a clump of what was clearly fungus. This is the worst thing you can see when buying a lens and you’ve got two choices at this point – send it back or… fix it. Well, you don’t need to be a genius to work out which route I chose.
Fungus time
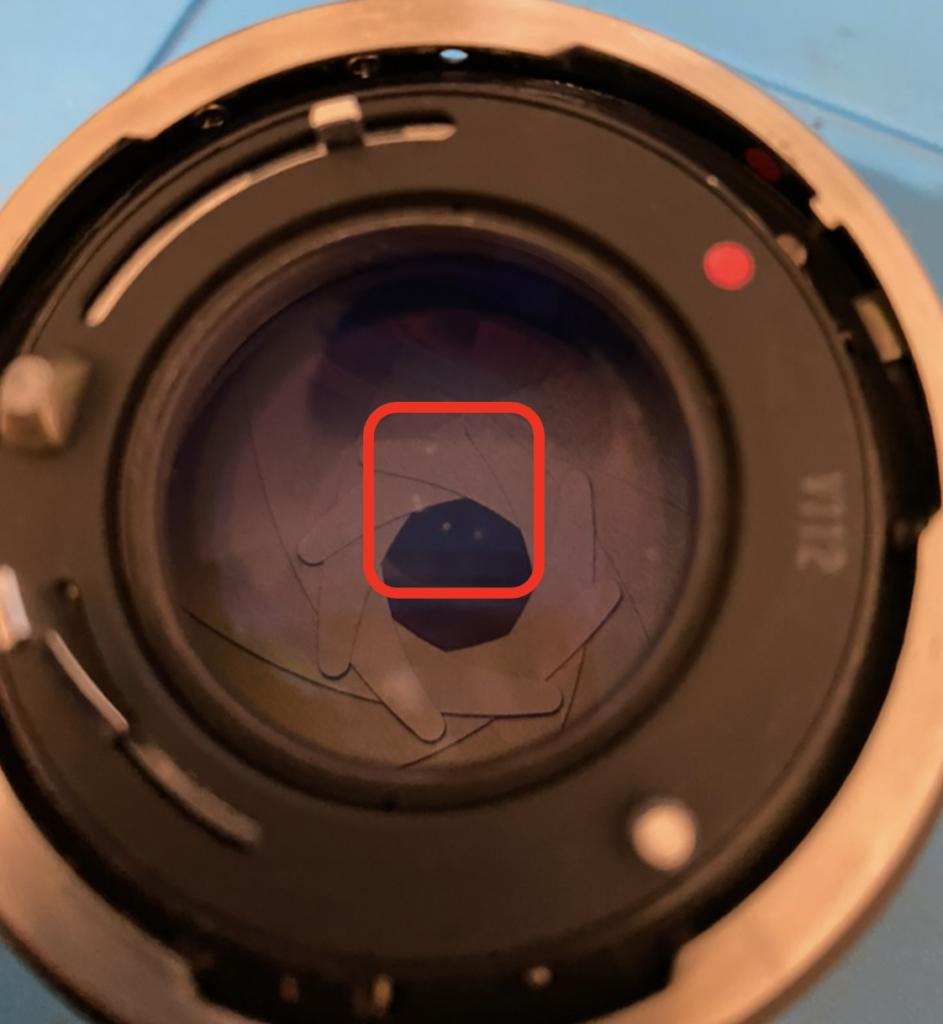
Looking at the picture, you can see five or so tell-tale white dots inside the red square. If you were to see these in person you could make out the spores that look like frost patterns or snow flakes. Unlike frost, fungus isn’t nice, it’s a nightmare that will keep growing.
Some sellers like to comedically describe lenses like this something along the lines of “small signs of fungus but doesn’t affect the image quality in any way.” Apart from being obviously absurd, this just isn’t true. Anything which is physically in the way of light passing through your lens will have an effect on your image quality, no matter how apparently imperceptible.
Whether you can see fungus in images or not, it isn’t a problem you want to ignore. If you leave it, the fungus will grow. Ultimately, if you leave it long enough in the wrong conditions, the fungus does have the potential to damage the glass beyond economical or easy repair. Long story short – the second you see it you should tackle it.
The argument for fungus repair is fairly easy because you now have a lens which is in a damaged or faulty state. Your choice is therefore simple – have a go at repairing it and bringing it back to working order, or leave it and lose your investment in a potentially quality bit of kit. There’s nothing to lose, really, you might as well have a go even if you end up with a pile of bits you’ll learn something.
How to repair a FD 50mm F1.4
Tools for the job
You don’t need many specialist tools at all to take an FD lens apart, but one thing is absolutely essential – a set of Japanese Industrial Standard or “JIS” screwdrivers. On the face of it, a screw is a screw, and you definitely can get by bodging your way along with normal cross head bits. However, the second you come across a screw which is remotely stubborn, rusted, corroded or simply just a bit tight you will strip the head of the screw off.
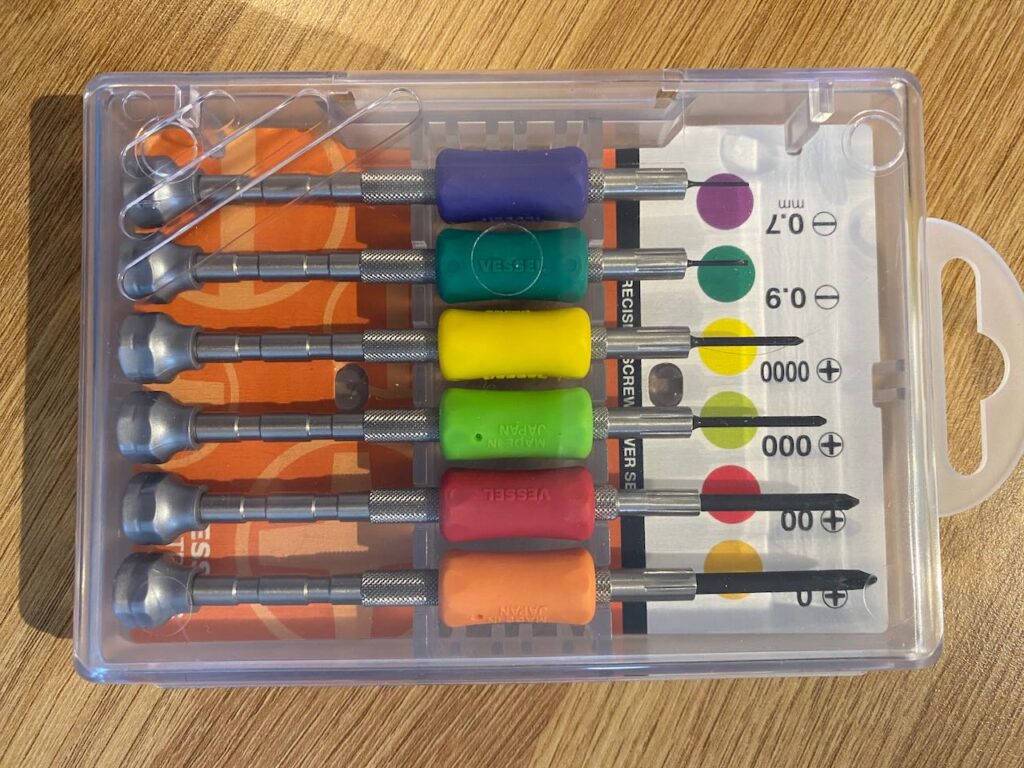
Canon FD lenses are constructed using all JIS standard screws and some are very small, if you’re going to take your lenses apart, you may as well do a proper job and spend the £10 or so on a set of proper screwdrivers. I cannot emphasise how much having the proper tools will make your life easier, less stressful and less full of stripped screw heads. If you intend on doing a lot of work on lenses or cameras, you might want to invest in better drivers than the set shown above, but they will certainly do for the odd repair.
Other things you will need are:
- Isopropyl alcohol
- Lighter fluid
- Disposable lens wipes
- Lens cloth
Lens cloths are a nightmare, the ones that come with your glasses or similar are spectacularly useless and just smear grease around the glass. The best type of cloth are the flocked material, they used to come free with first generation iPads, but now Apple will sell you one for an extortionate amount, but they really are good. I think something like this is the right material, but I can’t be fully sure just looking at a picture. What you’re after is a cloth which does not leave micro fibres behind.
Lighter fluid is an excellent cleaner and will not leave a residue behind. It can be particularly useful when alcohol doesn’t cut it and neither will damage or remove the reflective coatings on the lens elements.
Removing rear elements
Identifying where the fungus is can be a surprisingly difficult task. Due to the nature of lenses, it can look like the fungus is closer to you than it actually is and, in my case, I had to get down to the very last and innermost element before I could actually clean it off. Depending on the lens you are working on this will be a more or less complex job than the one shown here, all depending on how many elements and groups are inside your lens. Just gradually work your way along, disassembling and cleaning as necessary.
There are some parts of the lens that you don’t need to take apart to clean the optics. If you remove all screws, you can and will end up in an absolute nightmare situation with ball bearings, springs and small components everywhere.
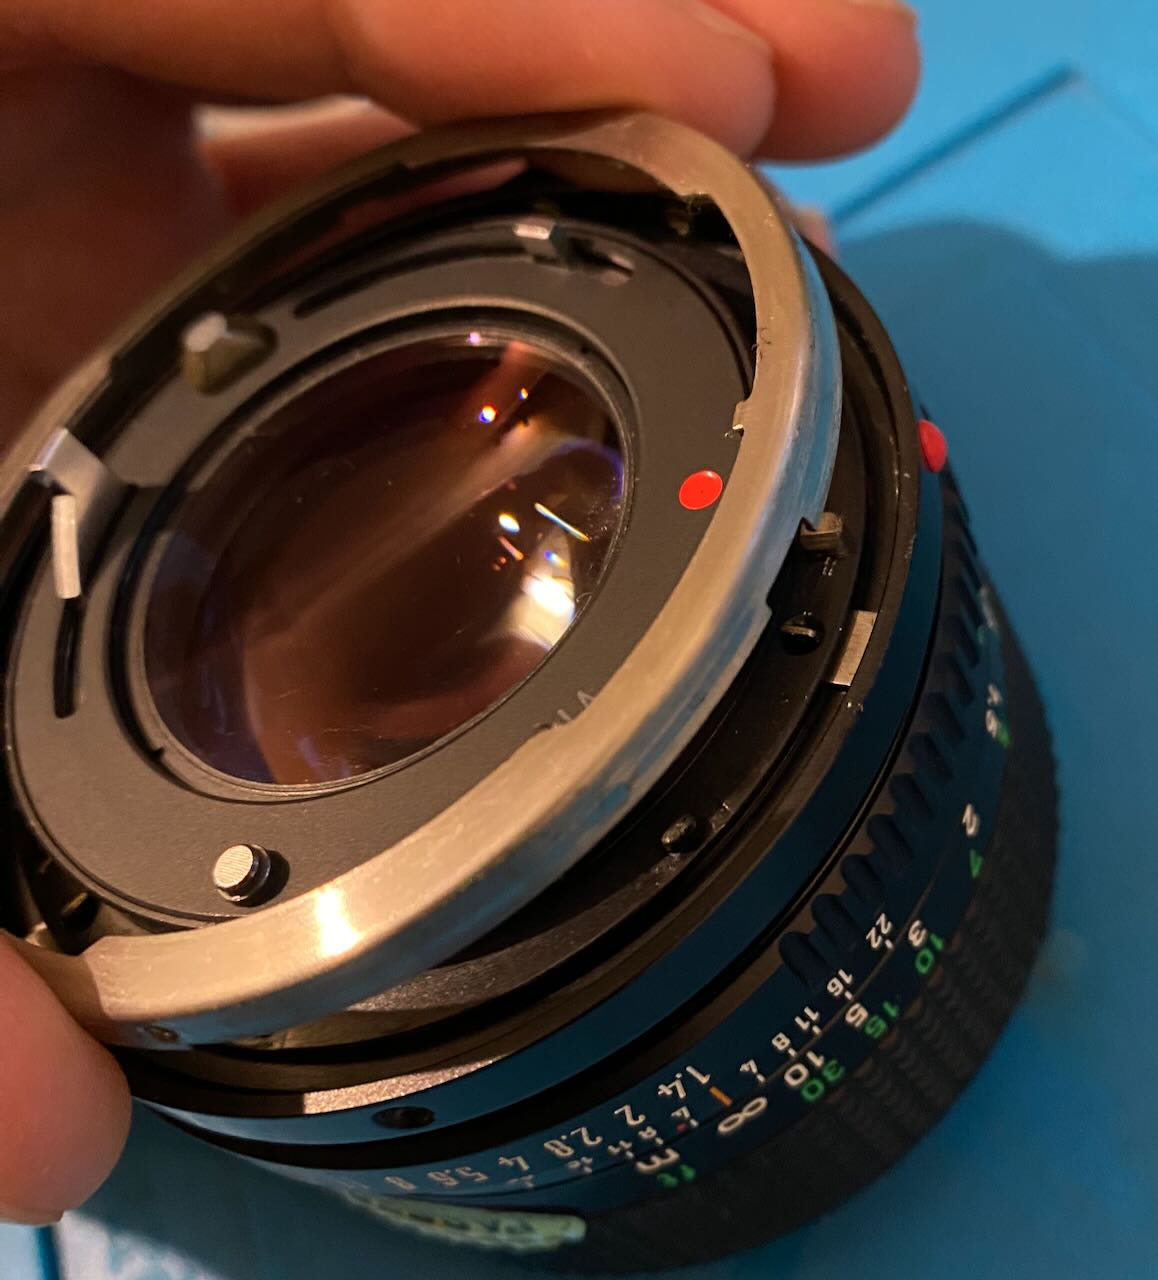
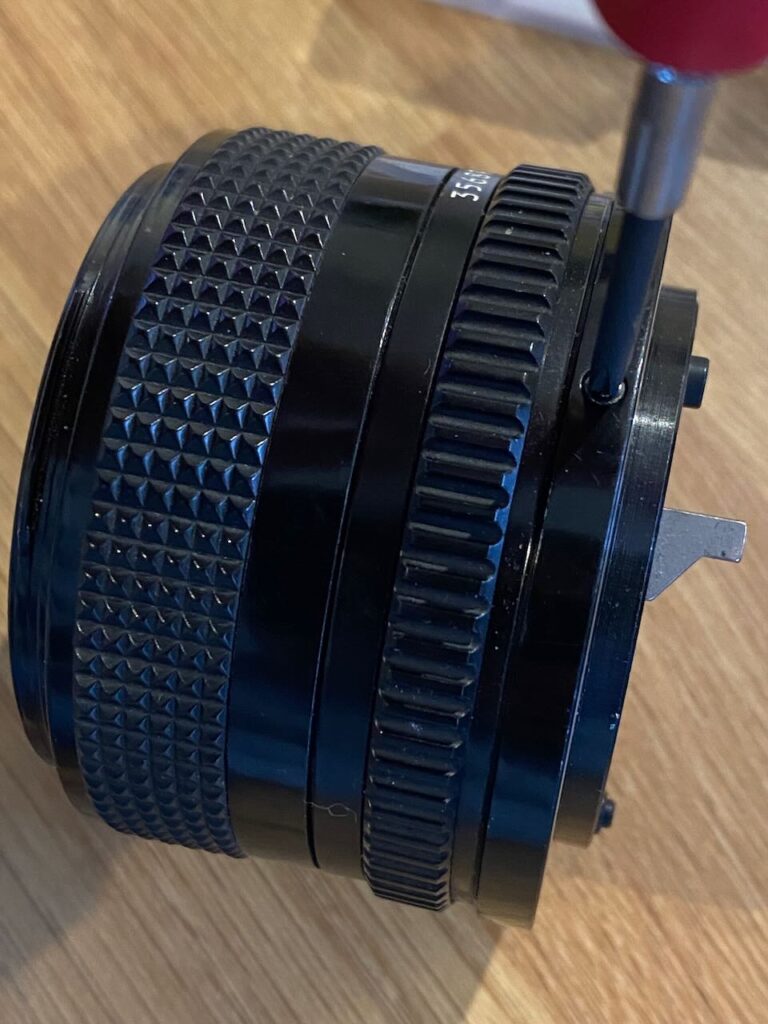
Begin with the three small size 00 black screws around the rear barrel of the lens. Once removed you can use a small plastic pry tool or the end of your tweezers to lift out the silver mounting ring as shown below.
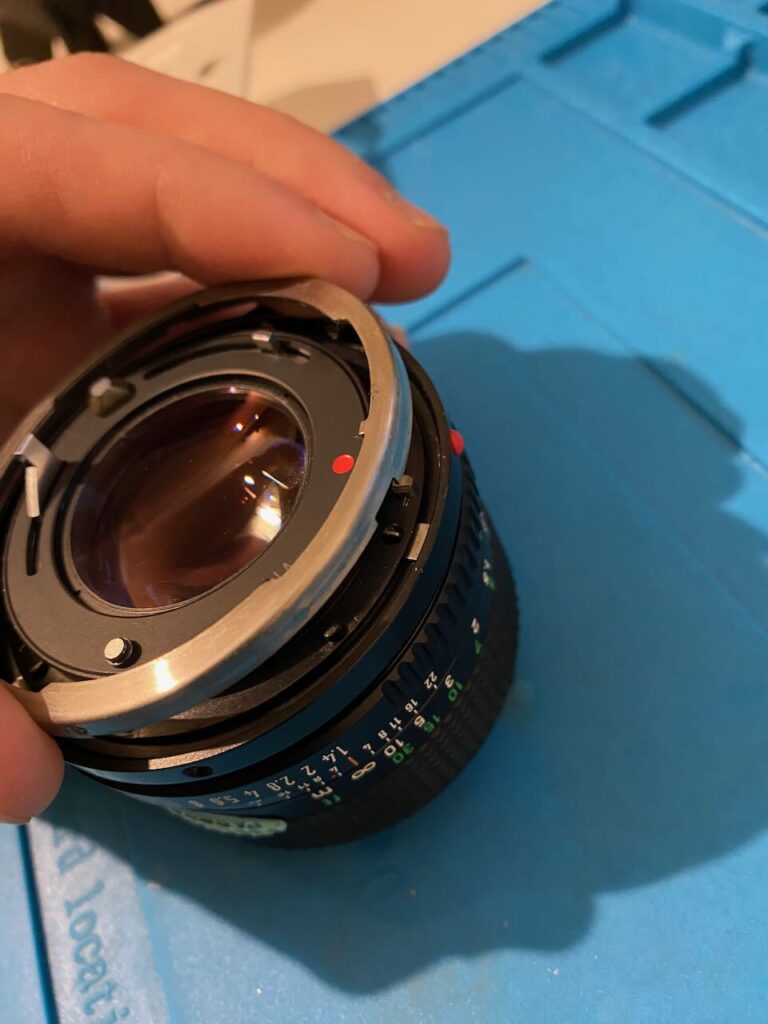
You don’t need to worry too much about the orientation of these components as they will only go in one way round during reconstruction. For example, the silver mounting ring has two rounded humps which go around the lock button. You can then hold the aperture lever and lift out the entire assembly which controls aperture from the camera to the lens. Do not be surprised when it rotates itself or you hear a few clicks as the lens sets itself to the default positions. Just note that the correct orientation is with both red dots aligned and we will come back to that later.
You now have access to the rear lens elements. The first of which simply screws off. You may need to hold the edges with a cloth for some extra purchase, but in my case it was finger tight. Simply unscrew the element and place on a soft surface for cleaning. You now need to be extremely delicate, slow and careful with the next part.
The lower element is held in place by a rubber “O” ring which needs to be very gently lifted out. It has thin and thick sections all the way around, the thinner of which fit into a recess and the thicker parts hold the lens in place. It is a surprisingly simple yet effective method of holding a piece of glass in place.
Use only plastic tools at this point. Tweezers are asking for trouble. Make your way around the full circumference of the ring and gently pry away from the recess. Eventually the ring will left out, but it has a habit of sticking itself back in so resist the urge to tug it out and go back to gently prying with a plastic tool.
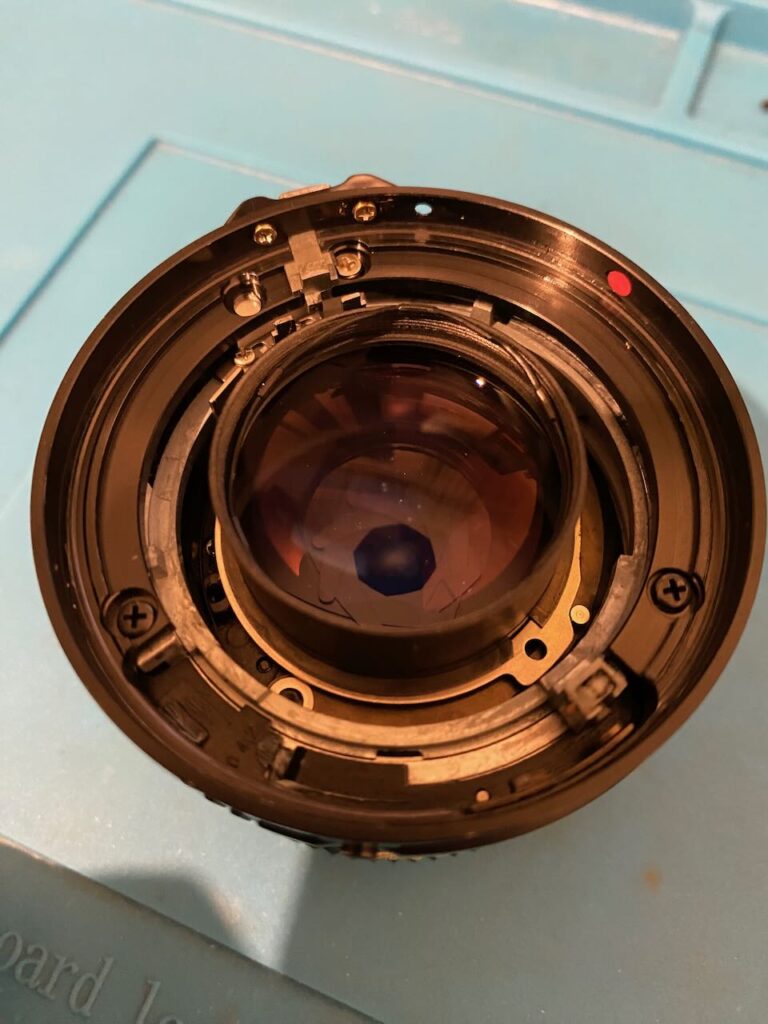
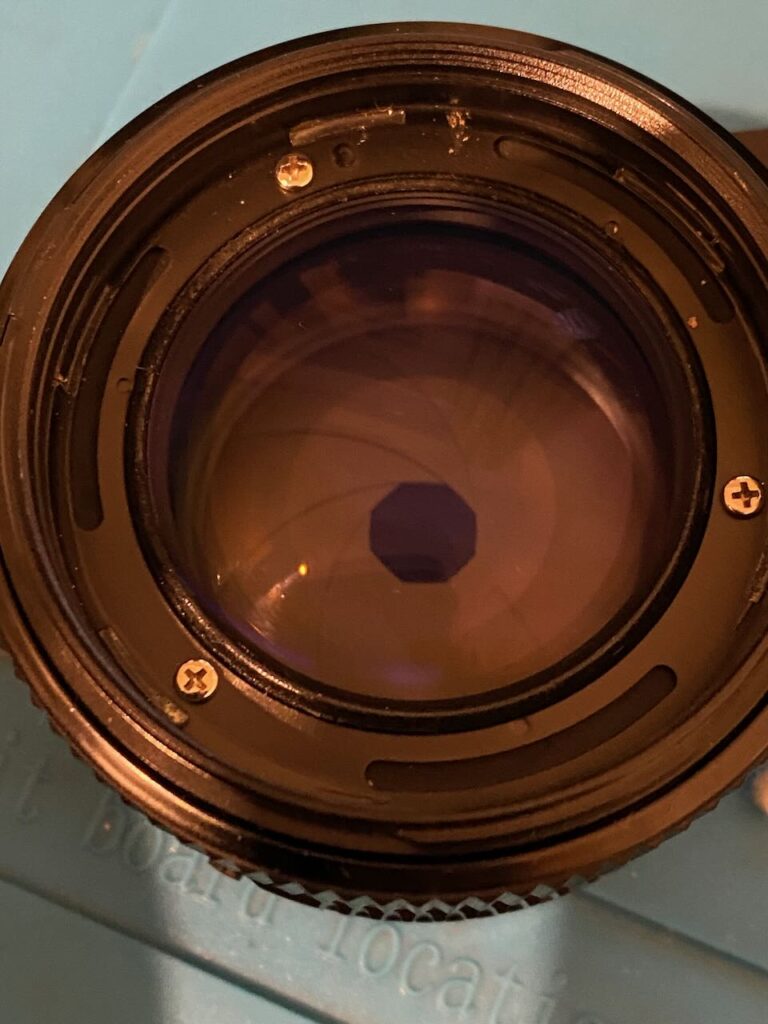
When the rubber ring is removed the next element will just fall out of the lens. Behind this is a final rear element behind the aperture rings, however this is fixed into place. It can be removed but it isn’t necessary for cleaning, but to access the other side of this element means going in through the front. Guess what? This is where my fungal growth was…
Front elements access

Turning to the front of the lens you can see the plastic ring with white markings. This is a largely cosmetic vanity cover that hides the screws holding the front element in place. Removal will depend on the lens, some are attached using a double sided tape type of adhesive, others have an arrangement of plastic clips. In the case of this 50mm F1.4, it was plastic clips and they were an absolute nightmare to get off without causing any damage to the front elements.
I suggest placing a lens cloth over the front element before you begin, then insert something very thin and plastic under the plastic cover – I used a toothpick. Once a small gap has been created you need to use something a little more solid, yet still plastic to prise the cover up. Although only minor force is required to lift out this piece, if you used anything metal or abrasive you would without doubt damage the glass. I resorted to a plastic guitar pick and this worked perfectly.
Now the front element is exposed you have a choice. There is again only one real way round this goes, but you may opt to make a small mark on both lens and element surround to enable you to replace this in the exact same orientation. Either way, be very careful when removing the three screws – once they reach the end of their thread, they have a habit of falling over at which point your screwdriver will slip. If that slip is on to the glass, you can guess the outcome.
Once the three silver screws are removed, the whole front assembly will fall out revealing the aperture blades.
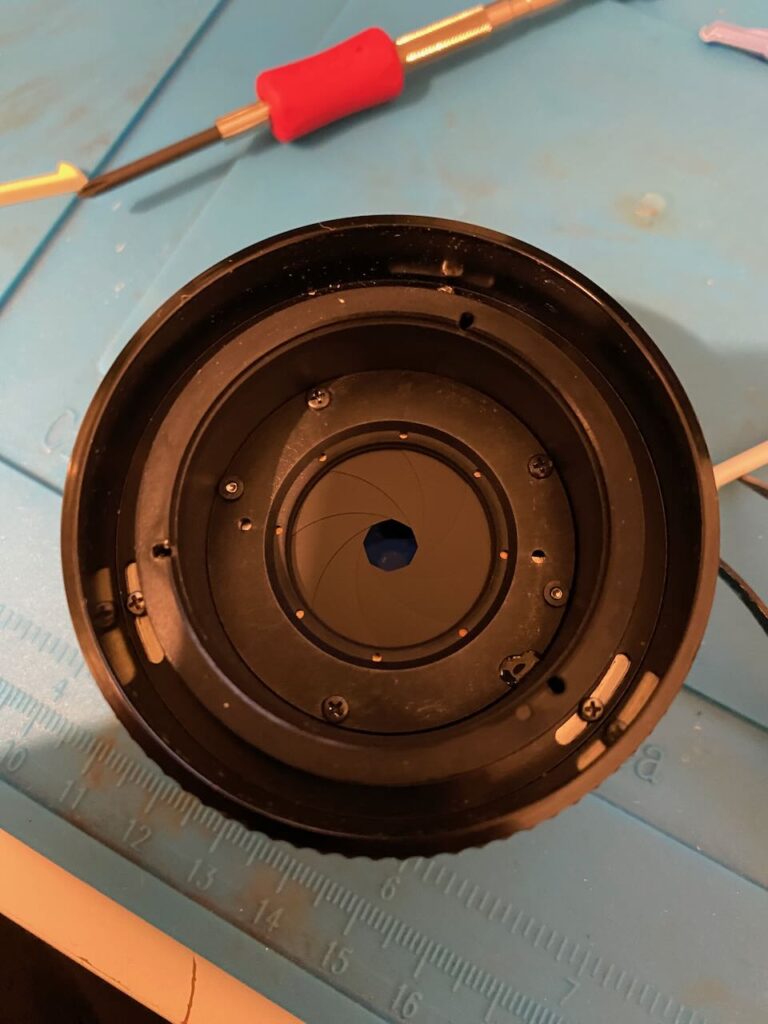
The aperture blade assembly is a delicate affair which is attached by three black screws but also by a very small blob of glue. Using a plastic tool (you do not want to scratch back to bare metal which will cause refraction issues) you need to remove this glue. Go slowly and carefully, if you slip you can very easily damage the delicate aperture blades. Remove the three black screws and the whole thing will fall out of what remains of the lens, revealing the other side of the final rear element.

If you’ve got this far, you have now revealed every element of the lens and can begin the arduous cleaning process. There is no need at all to take element groups apart unless there is an offensive amount of dust in between a particular group.
Cleaning elements
Cleaning is not a quick process. Let me just repeat that. It is not a quick process.
Some extra tools here will speed things up, but the biggest enemy is your fingers. If you can, wear disposable gloves to avoid the grease and other residue from your skin transferring on to the glass. If you want, invest in a rubber lens stand and a lens element sucker which can be used to move glass around without direct contact.
A piece of glass may look clean to the naked eye, but in reality is smeared or still contains dust. The only way to ensure a complete clean is to shine a powerful light on and through the glass to reveal the true state of cleanliness. Use wipes, alcohol and lighter fluid to remove all grease, stains or similar and allow to dry naturally before using an air blower to remove final dust specs. You need to remove all traces of dust – the final assembly magnifies dust particles so they look absolutely huge. I had one left inside after first reassembly and after I removed the front element again to get to it, I found I couldn’t see it because it was so small.
As for the fungus itself, cleaning depends on the severity of the fungus. I was lucky, it was very early stages and wiped off without issue. Hopefully, if I keep it dry and in a decent atmosphere, it won’t come back too soon. However, if you’ve anything even remotely worse you will need to resort to chemical treatment.
Fungus isn’t killed by alcohol or lighter fluid and the only real way to treat it is a mixture of hydrogen peroxide and ammonia. You have to be really careful here as this solution will eat both fungus and your lens coating given half a chance. It is better to clean too little than too much with these chemicals and a restrained approach is recommended.
Overall, you may well find the cleaning process intensely irritating as dust can and will appear from nowhere and smears will just keep smearing rather than disappearing. If this happens, open a new lens wipe, use sparingly, allow to dry and blow off with air. It will eventually come up like new glass.
Some tips:
- Don’t use your bare fingers
- Operate a “clean room” environment – don’t use cleaning materials more than once, use new wipes for each pass
- Invest in a rocket blower, do not use canned or compressed air
- Blow out each element before reassembling, blow out what has already been reassembled before adding a new part.
Reassembly
In classic iFixit style, reassembly is the reverse of disassembly with the following caveats.
- When putting the aperture assembly back, it only fits one way round and a pin will need clicking into place at the rear of the lens. I used this excellent video I found on YouTube and this link takes you to the exact timestamp you need.
- However, the above video isn’t perfect at the end, the assembly of the lens mount is incorrect. You must make sure the two red dots align. Again, follow the tips here for correct insertion of the various forks/blades but you must then twist the assembly so the red dots line up. If you let go, it will spring back so it must be held with one hand whilst you install the metal lens mount ring with another. Once the metal ring is back in place it will no longer rotate and you can replace the final three screws.
Conclusions and learning
Whether Canon designed the FD lenses with repairability in mind or not, they are very easy to take apart and maintain. Anyone with enough patience and who is willing to invest a few pounds in the right equipment should have no problem bringing a dirty or lightly fungus infested lens back to life. I certainly won’t hesitate to service these lenses again in future.
However, be careful if you now start going on the hunt for the dirtiest lens you can possibly find at the cheapest price – not all fungus and dirt will just fall off a lens with a gentle wipe. Depending on the length of time that has passed and amount of growth, fungus can and will “eat” away at the glass and any coatings, requiring much more aggressive cleaning. There is a point where a lens element can be beyond repair. You do have the option of swapping like for like elements between two broken lenses to make one good one, but if you get to that stage your total investment may well be higher than the actual value of a clean copy.
Above all, prevention is better than cure. Keep your camera gear indoors, not in a garage or loft. Don’t store them in the bottom of wardrobes or similar. If you can, pack your camera cases full of silica gel and put things you’re not using in dark places or storage boxes. Ultimately, use your gear, don’t just hoard stuff and put it on shelves to be admired. One day, through one reason or another, all of this gear will stop working and its better to have used it than to have looked at it.
Share this post: